Tag Archives: diy

The TRUE COST OF A HANDMADE CHRISTMAS

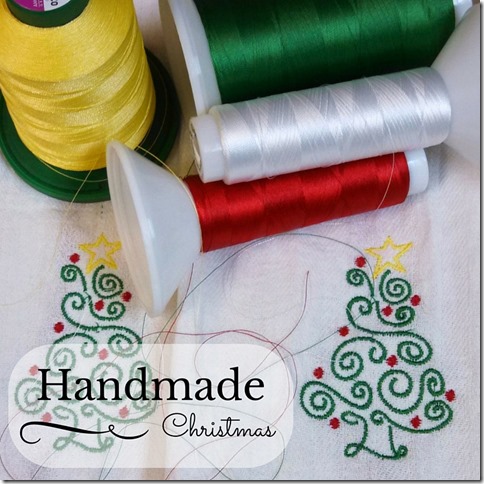
handmade Christmas

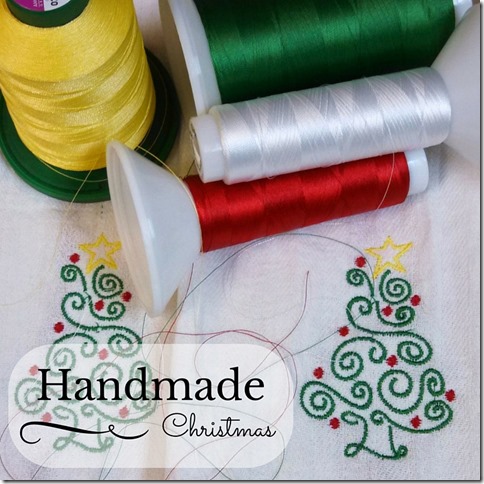
A Handmade Christmas.  It sounds like the perfect romantic “Winter Wonderland, I’ll Be Home For Christmas” dream holiday.  It also sounds blissfully frugal if your Christmas budget is tight.  If that’s why you’re thinking of a Handmade Christmas, then it’s time we have a talk.  The TALK.

The cost of handmade.

First off, it’s handmade, not homemade.  Glad we’ve gotten that cleared up.

Second, a handmade gift is not the cheap way out, it’s not a cop out, and it certainly not without a great deal of thought and love.  Hand-crafted pieces show the recipient that you truly know them, especially when each piece is customized.  But just how much is a hand-crafted piece worth?  Well, that’s a tough question.

Please know that a gift’s true value (no matter how much money is spent) is determined by the recipient.  If the receiver doesn’t want it, use it, treasure it, or at least share with someone who does, then the gift is pointless and basically worthless.  That’s the hard part about gifting.  Do we give because we are supposed to or because we want to?  Some people are so easy to buy for because you know that they will enjoy any gift the receive.  Some will never be thrilled.  So, as you prepare you handcrafted Christmas list, think about the recipients.  You can spend all the time and money and heart in the world, but if a person is just a grump, cut your losses and hit the sale rack at JCPenney.

Now, the nitty gritty.

Let’s take an apron.

This is one of my favorite apron patterns .  This apron requires 2 1/4 yards of fabric.  At $8/yard, that’s $18.  (The apron above is actually Amy Butler Fabric and was closer to $10/yard.)  Toss in the cost of the pattern ($10) and a spool of thread ($3).  This apron costs at least $31.  Then we add in cost of labor (1 hr at minimum wage), wear and tear on a sewing machine, use of electricity, and the fact that this apron is custom-designed for the recipient.  You’ve got a gift that would cost upwards of $50!  That my friends is a GIFT.  So why, do we feel that we must partner it with something store-bought to make it a gift worth giving?

So what about 3 jars of homemade jellies?  Well, 3 Half Pint Jelly Jars are about $3.  Pectin or Sure-Jell is another $3.  Then there’s the cost of the fruits.  That could range anywhere from $10-30.  (If you grew it yourself, consider the cost of the plant/seeds, the cost of water, fertilizers, labor to work the ground, time to pick, etc.)  At the minimum, we are looking at a $16 gift.  And that’s before you consider that the jelly maker stood over a hot stove for an hour and then canned the jelly!

20150817_170232

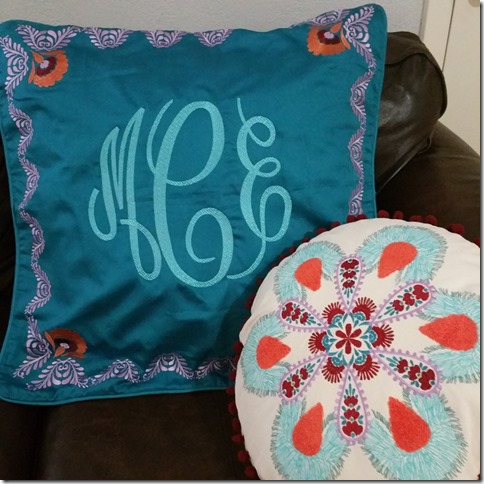
Let’s talk about machine embroidery and applique.  The monogram on this sham is 12 x 12 inches.  That’s huge.  It’s a fill stitch because of it’s size.  It took 3 hours on my big 10-needle machine.  It took 1 spool of aqua thread and 3 bobbins.  It also took a huge piece of stabilizer.  The supplies alone come to about $15.  (That’s not including the cost of the sham itself.)  Plus 3 hours time ($24 minimum wage).  Plus wear and tear on my machine, the fact that I had to stand at the machine and hold fabric out of the way for 3 hours and was unable to work on anything else during that time, electricity, and going rates for a 90,000 stitch monogram with 3 hoopings.  A monogram this size starts at $75 in most shops.

The Bottom line:

Hand-crafted gifts are not cheap.  If you are the gifter, you need to be certain that you are ready for the cost (both money and your time).  You need to be ready to be particular and precise.  You want to make your gifts as look as beautiful as they deserve given your investment.  They are luxury items, customized pieces, and in a sense, priceless.  Supplies cost money.  But, they also cost time.  And as a busy mom with a small business, time is more valuable than anything I could purchase for a loved one.   If you are the receiver, please remember that handmade gifts are not a cop out.  Treasure the gift, and most importantly, the thought behind them.

So what’s your plan?

I hope I haven’t talked you out of a handmade Christmas.  I really just needed to be frank about the cost of hand-crafted items.  Now that we’ve talked, here’s my recommended game plan:

  1. Sign up for the coupon/saving newsletter for your favorite stores:  Hobby Lobby, Hancock’s, JoAnns, Michael’s, Office Depot, etc.
  2. Make a master list of all the supplies you need.  Mark off the things you already have in your stash.
  3. Shop the sales and use your 40% off coupons.  Between the stores, something you need will ALWAYS be on sale.
  4. Raid your stash.  You hand-crafted Christmas will be much more affordable if you already have some of the supplies.
  5. Get ready to get busy!

THIS IS PART OF AN ONGOING SERIES:  HANDMADE CHRISTMAS. Look for future posts about making time to craft,  wrapping and presentation inspiration, and ideas for dads, teens, the family chef, the diva, the boy, the doggie Momma and more.

There are links in this post.  Some link back to this blog.  Some link to things I love and just want to share.  Some link to referrals for which I am compensated.  For more info, please check out my Shipping Links and Disclosure Statement.

A Handmade Christmas


A Handmade Christmas.

What does that mean to you?  To me it means handcrafted ornaments, personalized gifts, and lots of extra love.

I always have a grand plan to create personalized pieces for each family member, but something always gets in the way, maybe time or money or even the thought that my work isn’t good enough.

This year, I have a game plan.   If you’d like to create your own handmade Christmas, you’re welcome to follow along with me.

handmade Christmas

Let’s get started!

Let’s start with a few questions:  Why? Who? What? How? When?

  1. Why?  Why are you giving gifts?  Why this list of people?  Why DIY?
  2. Who do you need to gift to this upcoming Holiday season?  Family? Friends? Teachers? Your hairdresser?
  3. What do you want to gift?  Will everyone get gifts created around a theme?
  4. How are you going to craft these gifts?  What is your favorite hobby?  Do you love to sew?  Would you rather bake?  Is glitter more your style?  Do you want to learn a new skill or try something new?
  5. When are you going to do all this?  What kind of time do you have between now and Christmas (be honest)?

I’m taking the next few weeks and answering these questions myself.  I won’t answer all of them publicly because I do want my Christmas gifts to be surprises.   But, that “Why?” question:

Why am I giving gifts?

I know that for many people it seems super-early to be discussing Christmas gifts.  And it is, unless you are planning on creating them yourself.  But before I dedicate all this time and effort to creating gifts, let me tell you why I do it.

I give gifts at Christmas out of tradition.  We follow this tradition because it’s an opportunity to show my family and friends that I love them with a tangible presentsitem.  My kids don’t get lots of extras throughout the year.  It’s fun to spoil them with something significant at Christmas as a tangible way to say “I love you.”  They get a few small things (books, pjs, cds, new goggles or swim caps, art supplies, etc.) from Santa and then 3 gifts from us.  Usually these 3 things are a store-bought biggie (budget $75-100), something Mom-made, and a gift that the whole family will love (video or board games or movies).

I show love at Christmas because that’s what Christmas is all about.   I believe Christmas is the date we have selected to celebrate the earthly birthday of Jesus Christ.  The act of Jesus coming to earth as a humble human baby was an act of love as part of God’s ultimate plan for us.  You can read more about that here.  What better way to celebrate than to show love to my family and friends!

LOOK FOR FUTURE HANDMADE CHRISTMAS POSTS about making time to craft, the true cost of handmade, wrapping and presentation inspiration, and ideas for dads, teens, the family chef, the diva, the boy, the doggie Momma and more!

There are links in this post.  Some link back to this blog.  Some link to things I love and just want to share.  Some link to referrals for which I am compensated.  For more info, please check out my Shipping Links and Disclosure Statement.
Summer fun: DIY Marshmallow Guns

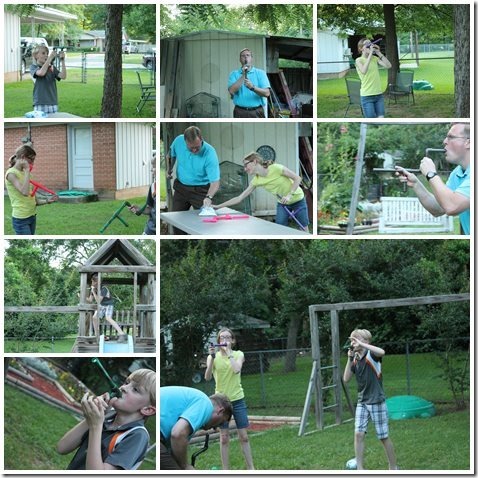
This happened at my house.  DIY Marshmallow Guns.

Marshmallow war collage

Inspired by this photo and completely made by Christopher and Grandpa!

IMG_9109

Here’s how they did it (in Christopher’s words):

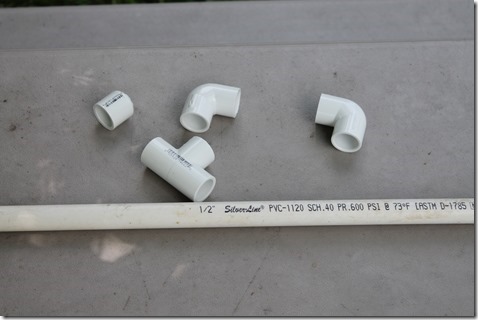
1.  You need 1/2 inch PVC pipe, 2 elbows, 1 T, and 1 cap.IMG_9007

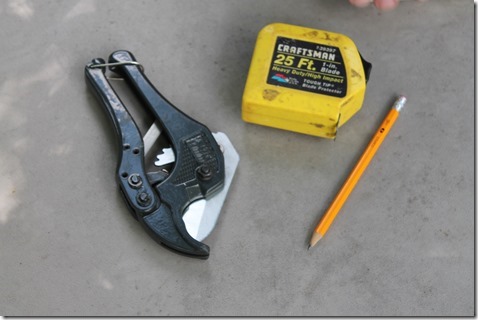
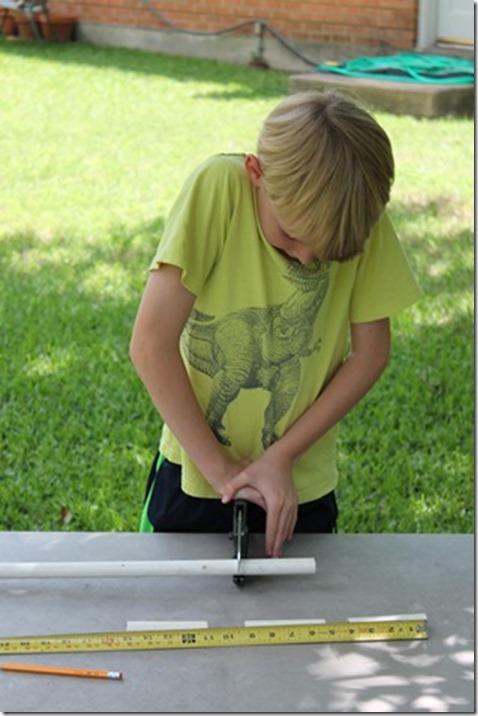
2.  Tools:  Pipe cutter or some way of cutting the pipe, tape measure, and a pencil.IMG_9008

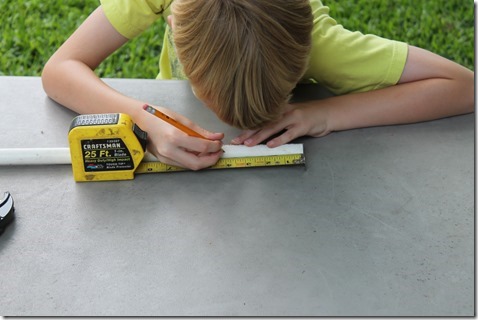
3.  Measure four 4-inch pieces of pipe and one 7-inch piece of pipe.IMG_9009

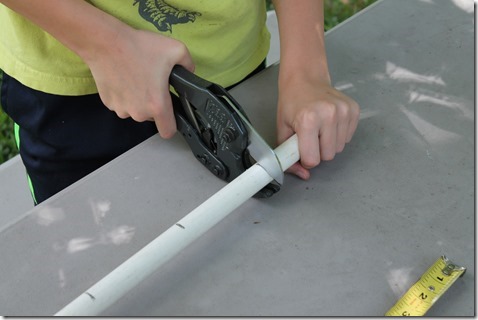
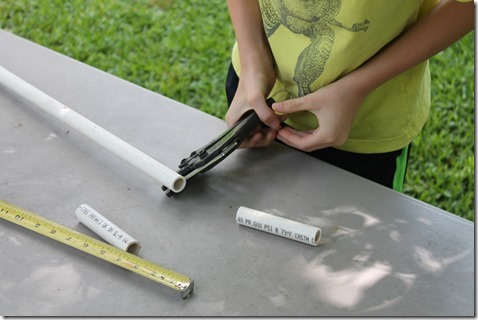
4.  Cut the pipe at your marks.IMG_9010

IMG_9011

IMG_9013

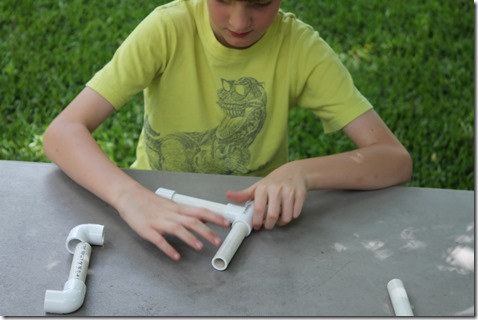
5.  Put a 4-inch pipe into the bottom of the T.  Cap it.   Put a 4-inch pipe into one side of the T.IMG_9014

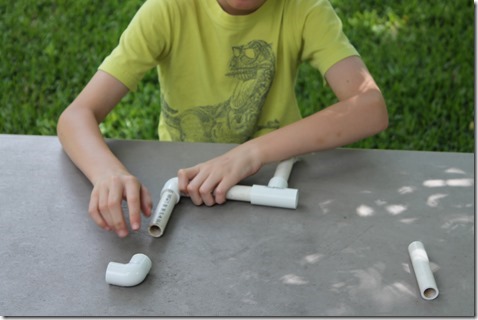
6.  Put an elbow on the end of this 4-inch pipe.  Put another 4-inch pipe in the other side of this elbow.IMG_9015

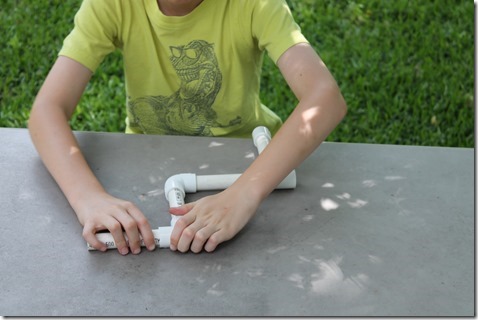
7.  Put the last 4-inch piece into this elbow.  This is your mouth piece.IMG_9016

8.   Put the 7-inch piece in the other side of the T.  This is your barrel where you load your marshmallow.

9.  Push it together tightly or glue it.

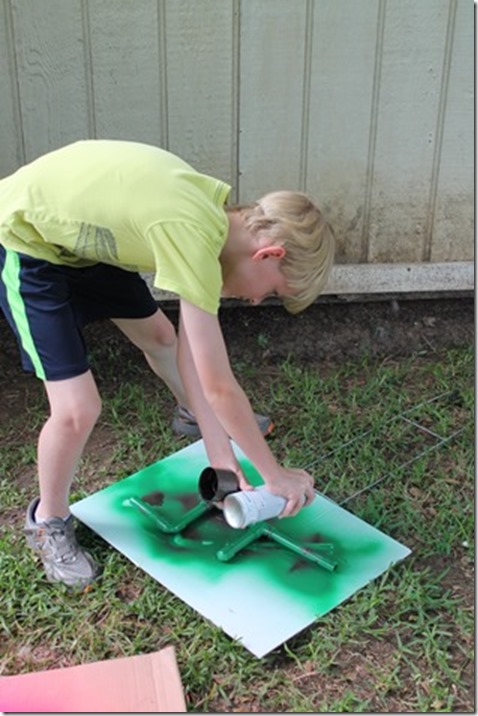
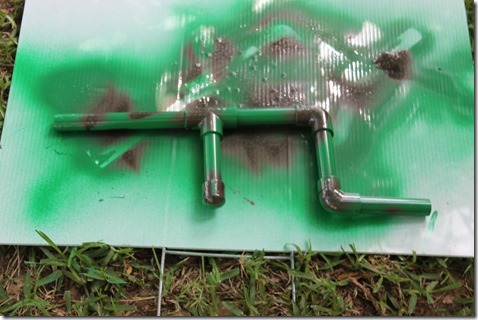
10.  Spray paint it.

IMG_9020

IMG_9022

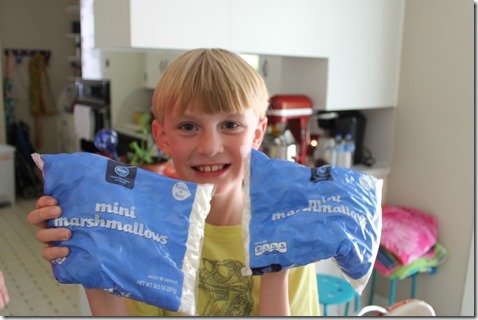
11.  Load your mini-marshmallow into the end of the 7-inch pipe.IMG_9018

12.  Blow hard to shoot your marshmallow.

IMG_9129

13.  Have fun.

IMG_9113

Make Your Own Skirt Pattern, Part 2

Ready to make a skirt that fits you beautifully?  Let’s get started.  You’ll need your measurements, some freezer paper or tissue paper, and a ruler.  A dressmakers’ curve would also be helpful, but it’s not totally necessary.

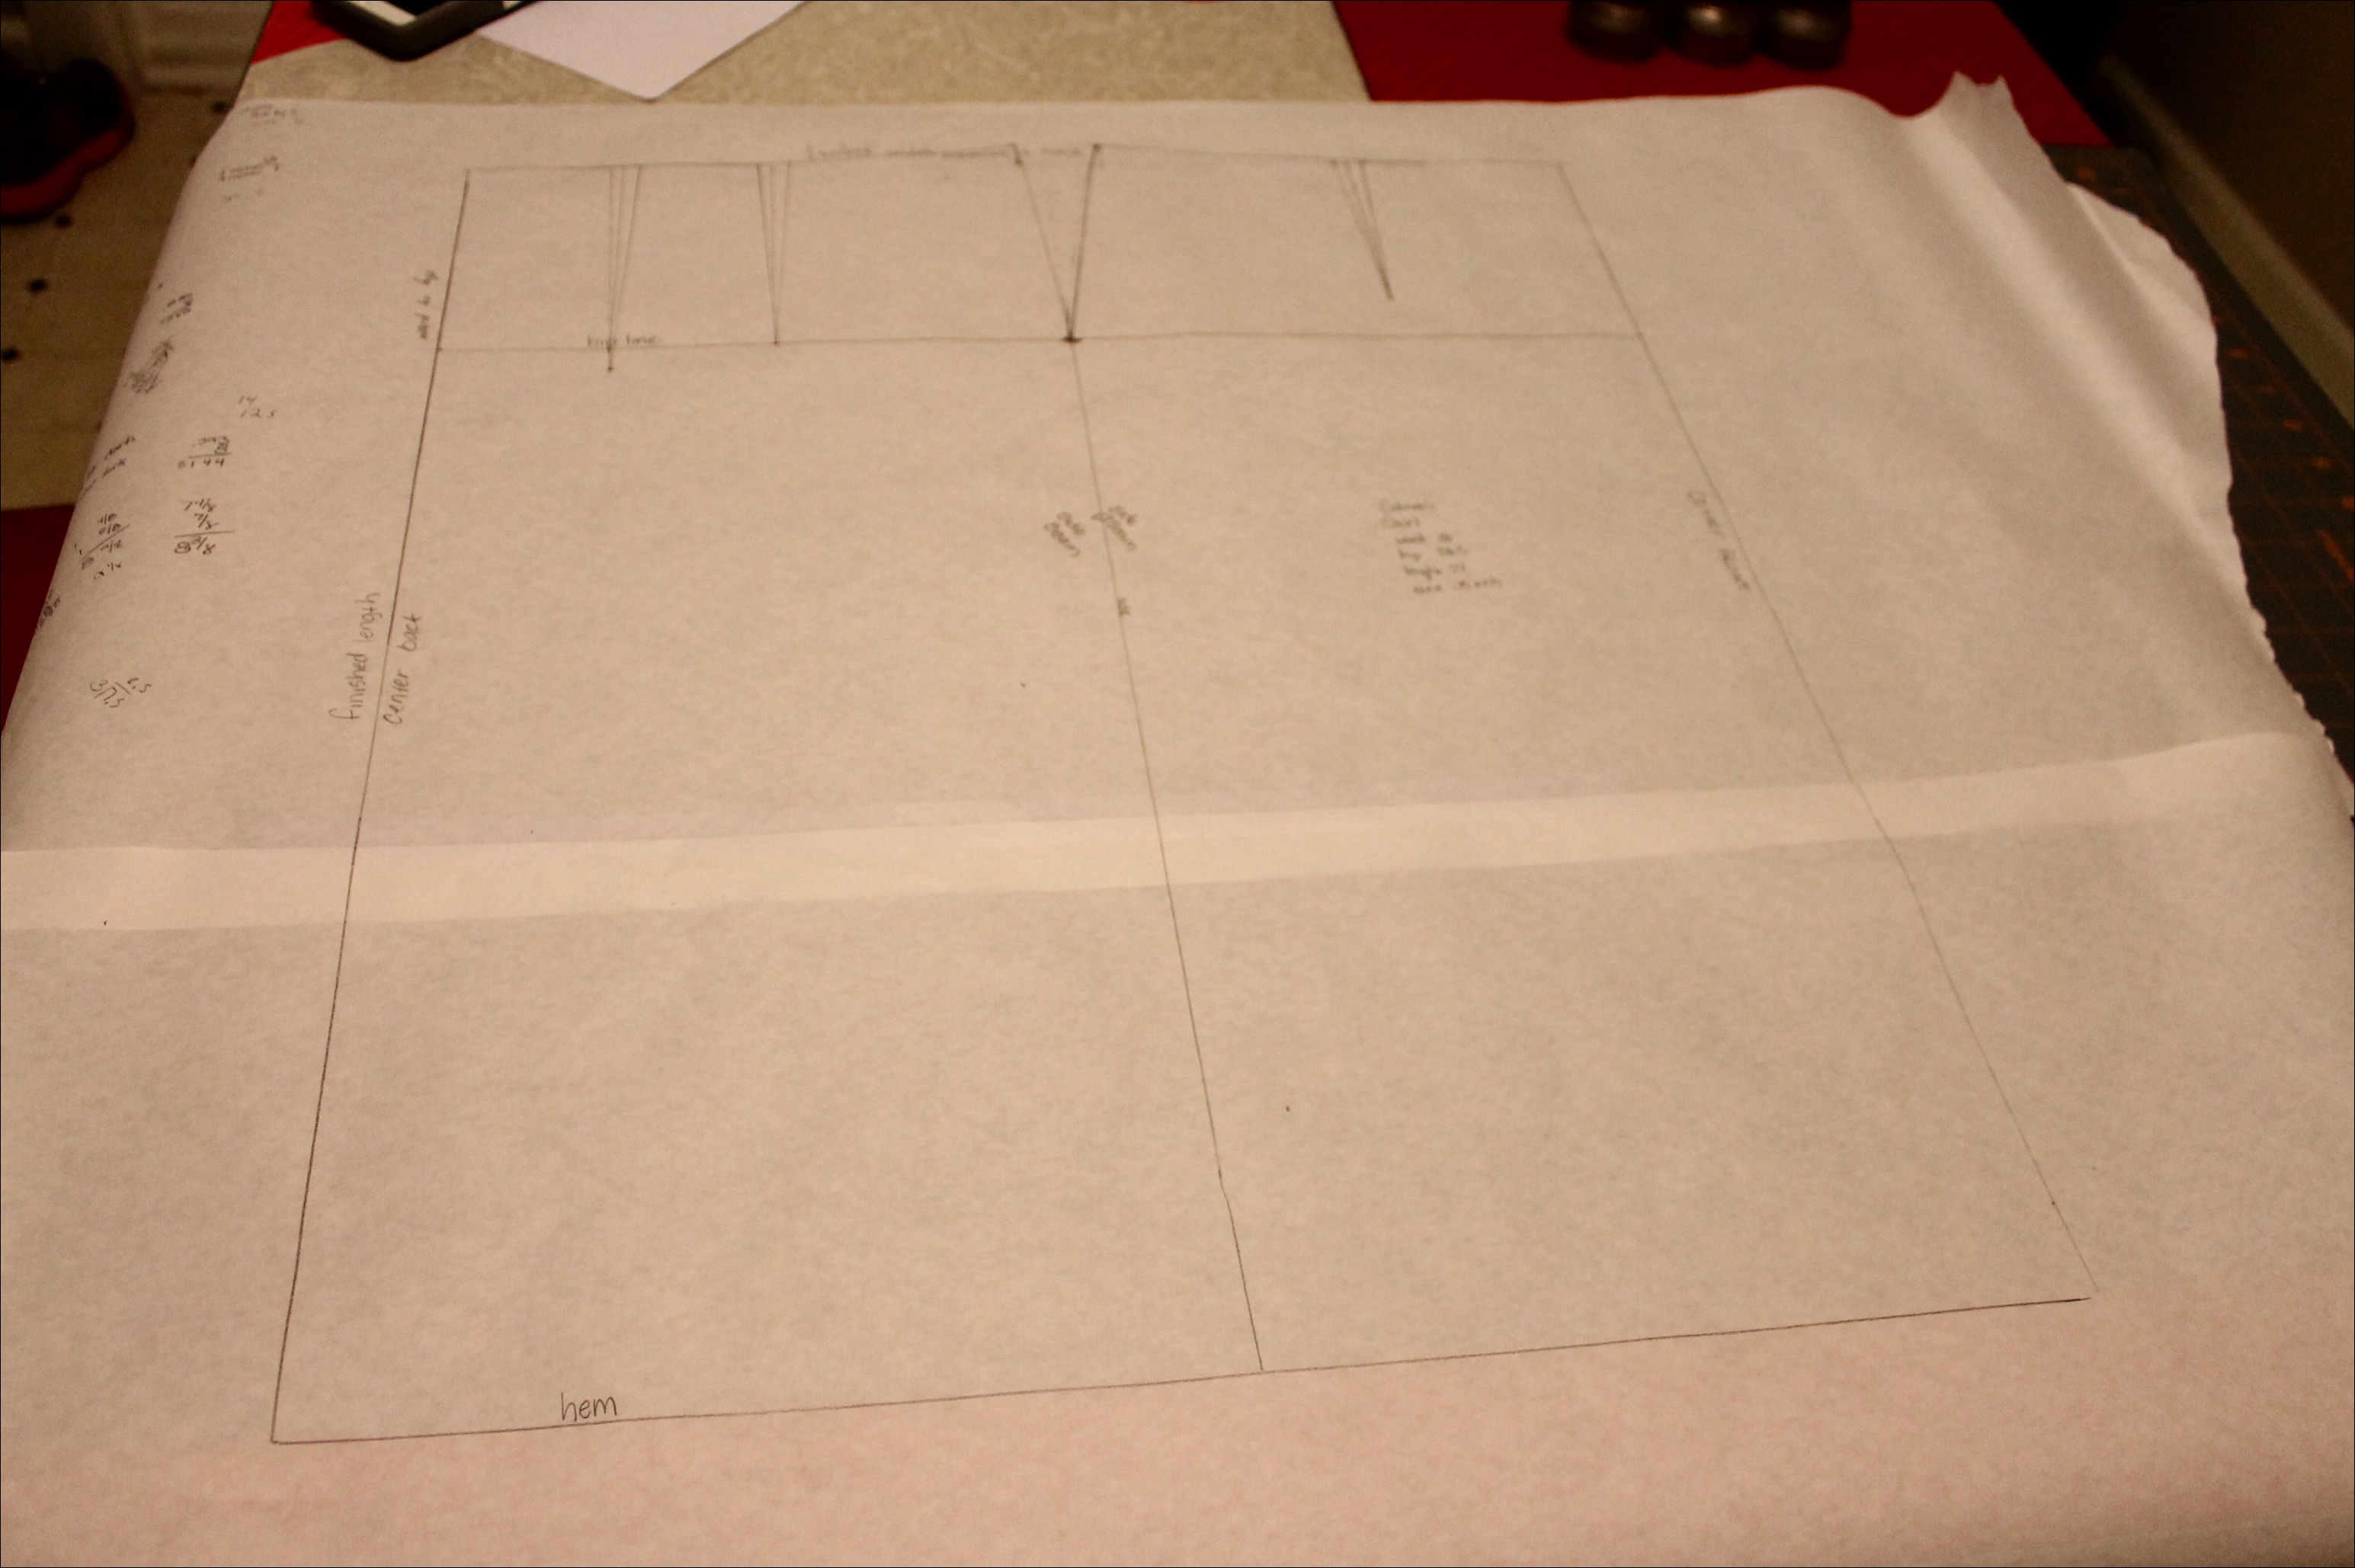
Here’s my sloper.  I use two pieces of freezer paper taped together for the width.

IMG_8226

So here’s how you do it:

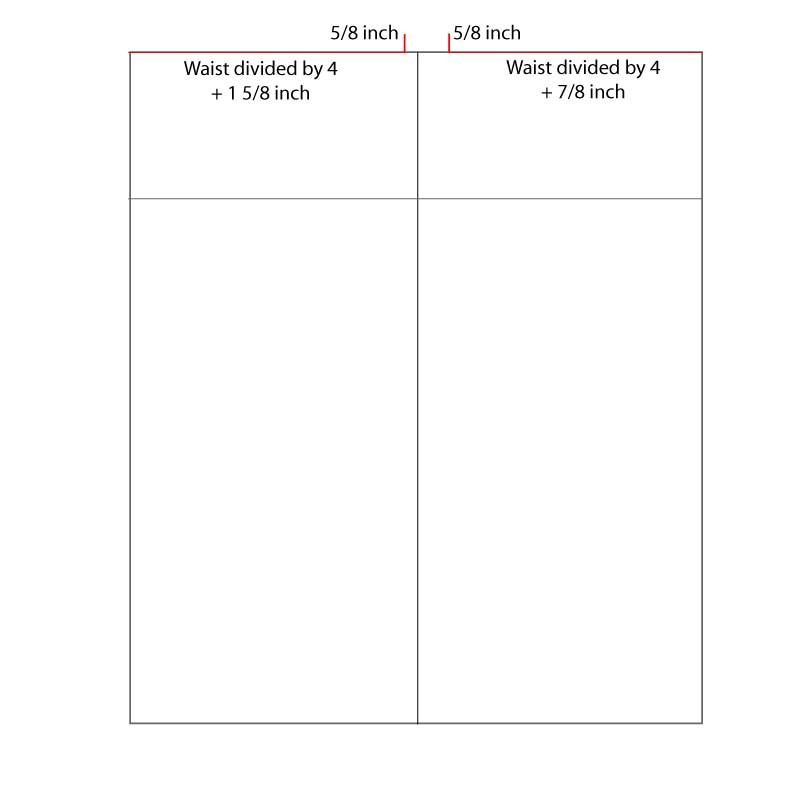
1.  Draw a rectangle.  The rectangle should be as long as your waist to hem measurement and as wide as 1/2 your widest width. 

Skirt-Tute-step-1

2.  Draw a line from top to bottom down the center of your rectangle.  Draw a second line across your rectangle at your hip measure.  This line should be down from the top the distance of your waist to hip measurement. 

Skirt-Tute-step-2

3.  Now we are going to start drawing the waist.  Divide your waist measurement by 4.  Add 1 5/8 inch to this measurement.  Make a mark that distance from the LEFT edge along the top.  Draw a small line up 5/8 inch up from there.  Now, add 7/8 inch to 1/4 your waist measure.  Make a mark that distance from the RIGHT edge along the top.  Draw another small line up 5/8 inch from that point.Skirt-Tute-Step-3

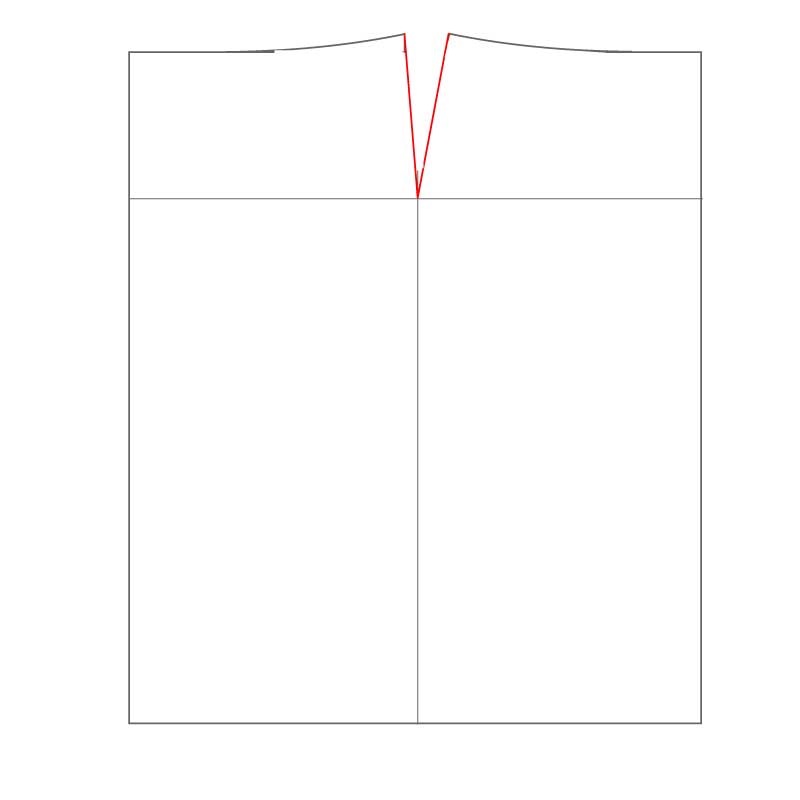
4.  Now we need to create our waist curve using these new lines.  Draw a curving line from the center of each narrow rectangle to connect with the top of the small line you drew up from the waist line.  A dressmaker’s curve will help, but if you don’t have one, just do your best.Skirt-Tute-step-4

5.  Time to connect your waist to your hips.  Your waist to hip line may have more curve than mine.  That’s fine if it does.  That’s why we are making our own personal skirt pattern.  To do this, draw a slightly curved line from the top of your waistline to your hip point (where your hip line intersects your midline).  Mine is almost straight because my waist is not a whole lot smaller than my hips.  Yours may be.skirt-tute-step-5

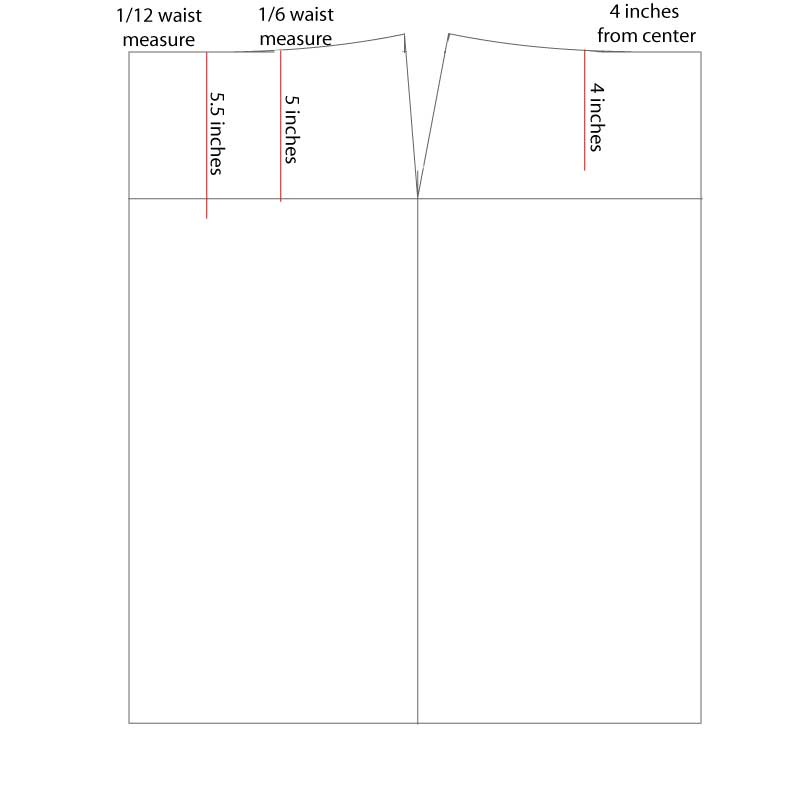
6.  Time to draw the darts.  The darts are how this flat piece will fit our curves.  Let’s work on the darts on the left first.  Divide your waist measurement by 12.  Measure in this distance from the left edge.  Draw a line 5.5 inches down from this point.  For the second back dart, divide your waist measurement by 6.  Draw a line 5 inches down from this point.  Now for the front darts.  Draw a line 4 inches down, 4 inches from the right edge.

skirt-tute-step-6

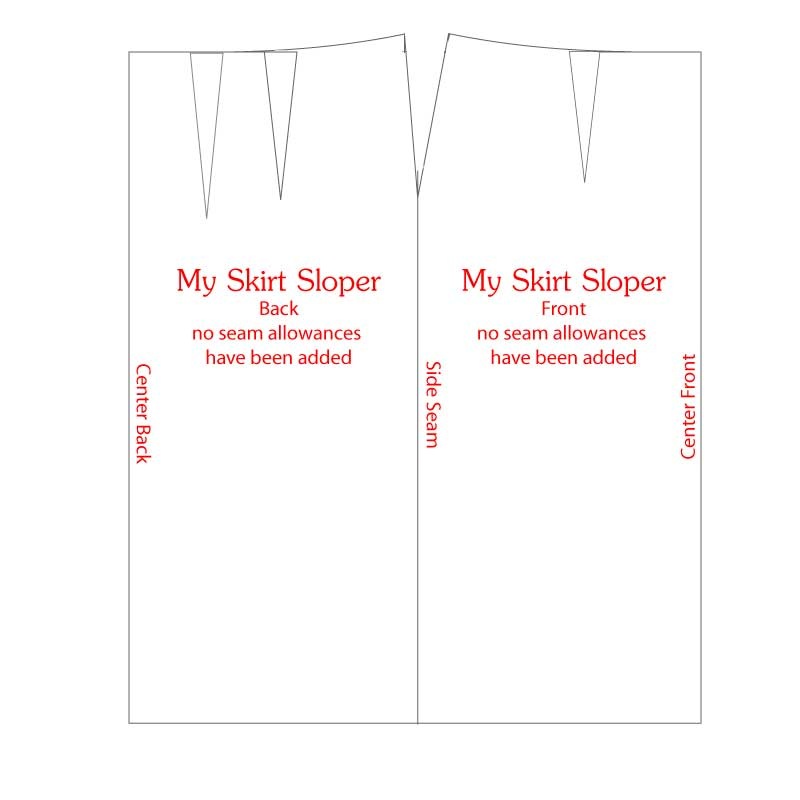
7.  Now to make these lines into darts, just draw triangles.  The base of each triangle is 5/8 inch wide and is centered over your dart line.  The base is along your waistline and the point of the triangle should touch the bottom of your dart line.  skirt-tute-step-7

8.  Almost done!  Label your sloper.  Here are the labels I use.skirt-tute-step-8

So…how’d you do? 

Here’s your assignment for next time:

1.  Cut out your sloper.  Don’t forget to cut down that center line, separating your front and back pieces.

2.  Trace both pieces of your sloper onto another sheet and add 1 inch around each piece.  Be sure to trace your darts too.

3.  Grab some fabric to make a muslin (a practice skirt).  You can raid your stash or grab something from the remnant bin at your favorite shop.  You’ll need 1 1/2-2 yards (basically, 2 x your waist to hip measure).

Party Planning for the almost-8-year-old!

We are planning a birthday party!  In just a few shorts days, my youngest will be 8!

After offering a few suggestions, he came up with an idea of his own.  He would like a Wii Bowling Party.  That I can do!

Of course, Pinterest has some wonderful suggestions for just such a party:


We will be keeping it small, but I see balloon streamers, red and white paper straws, and oreo bowling balls in my future!