
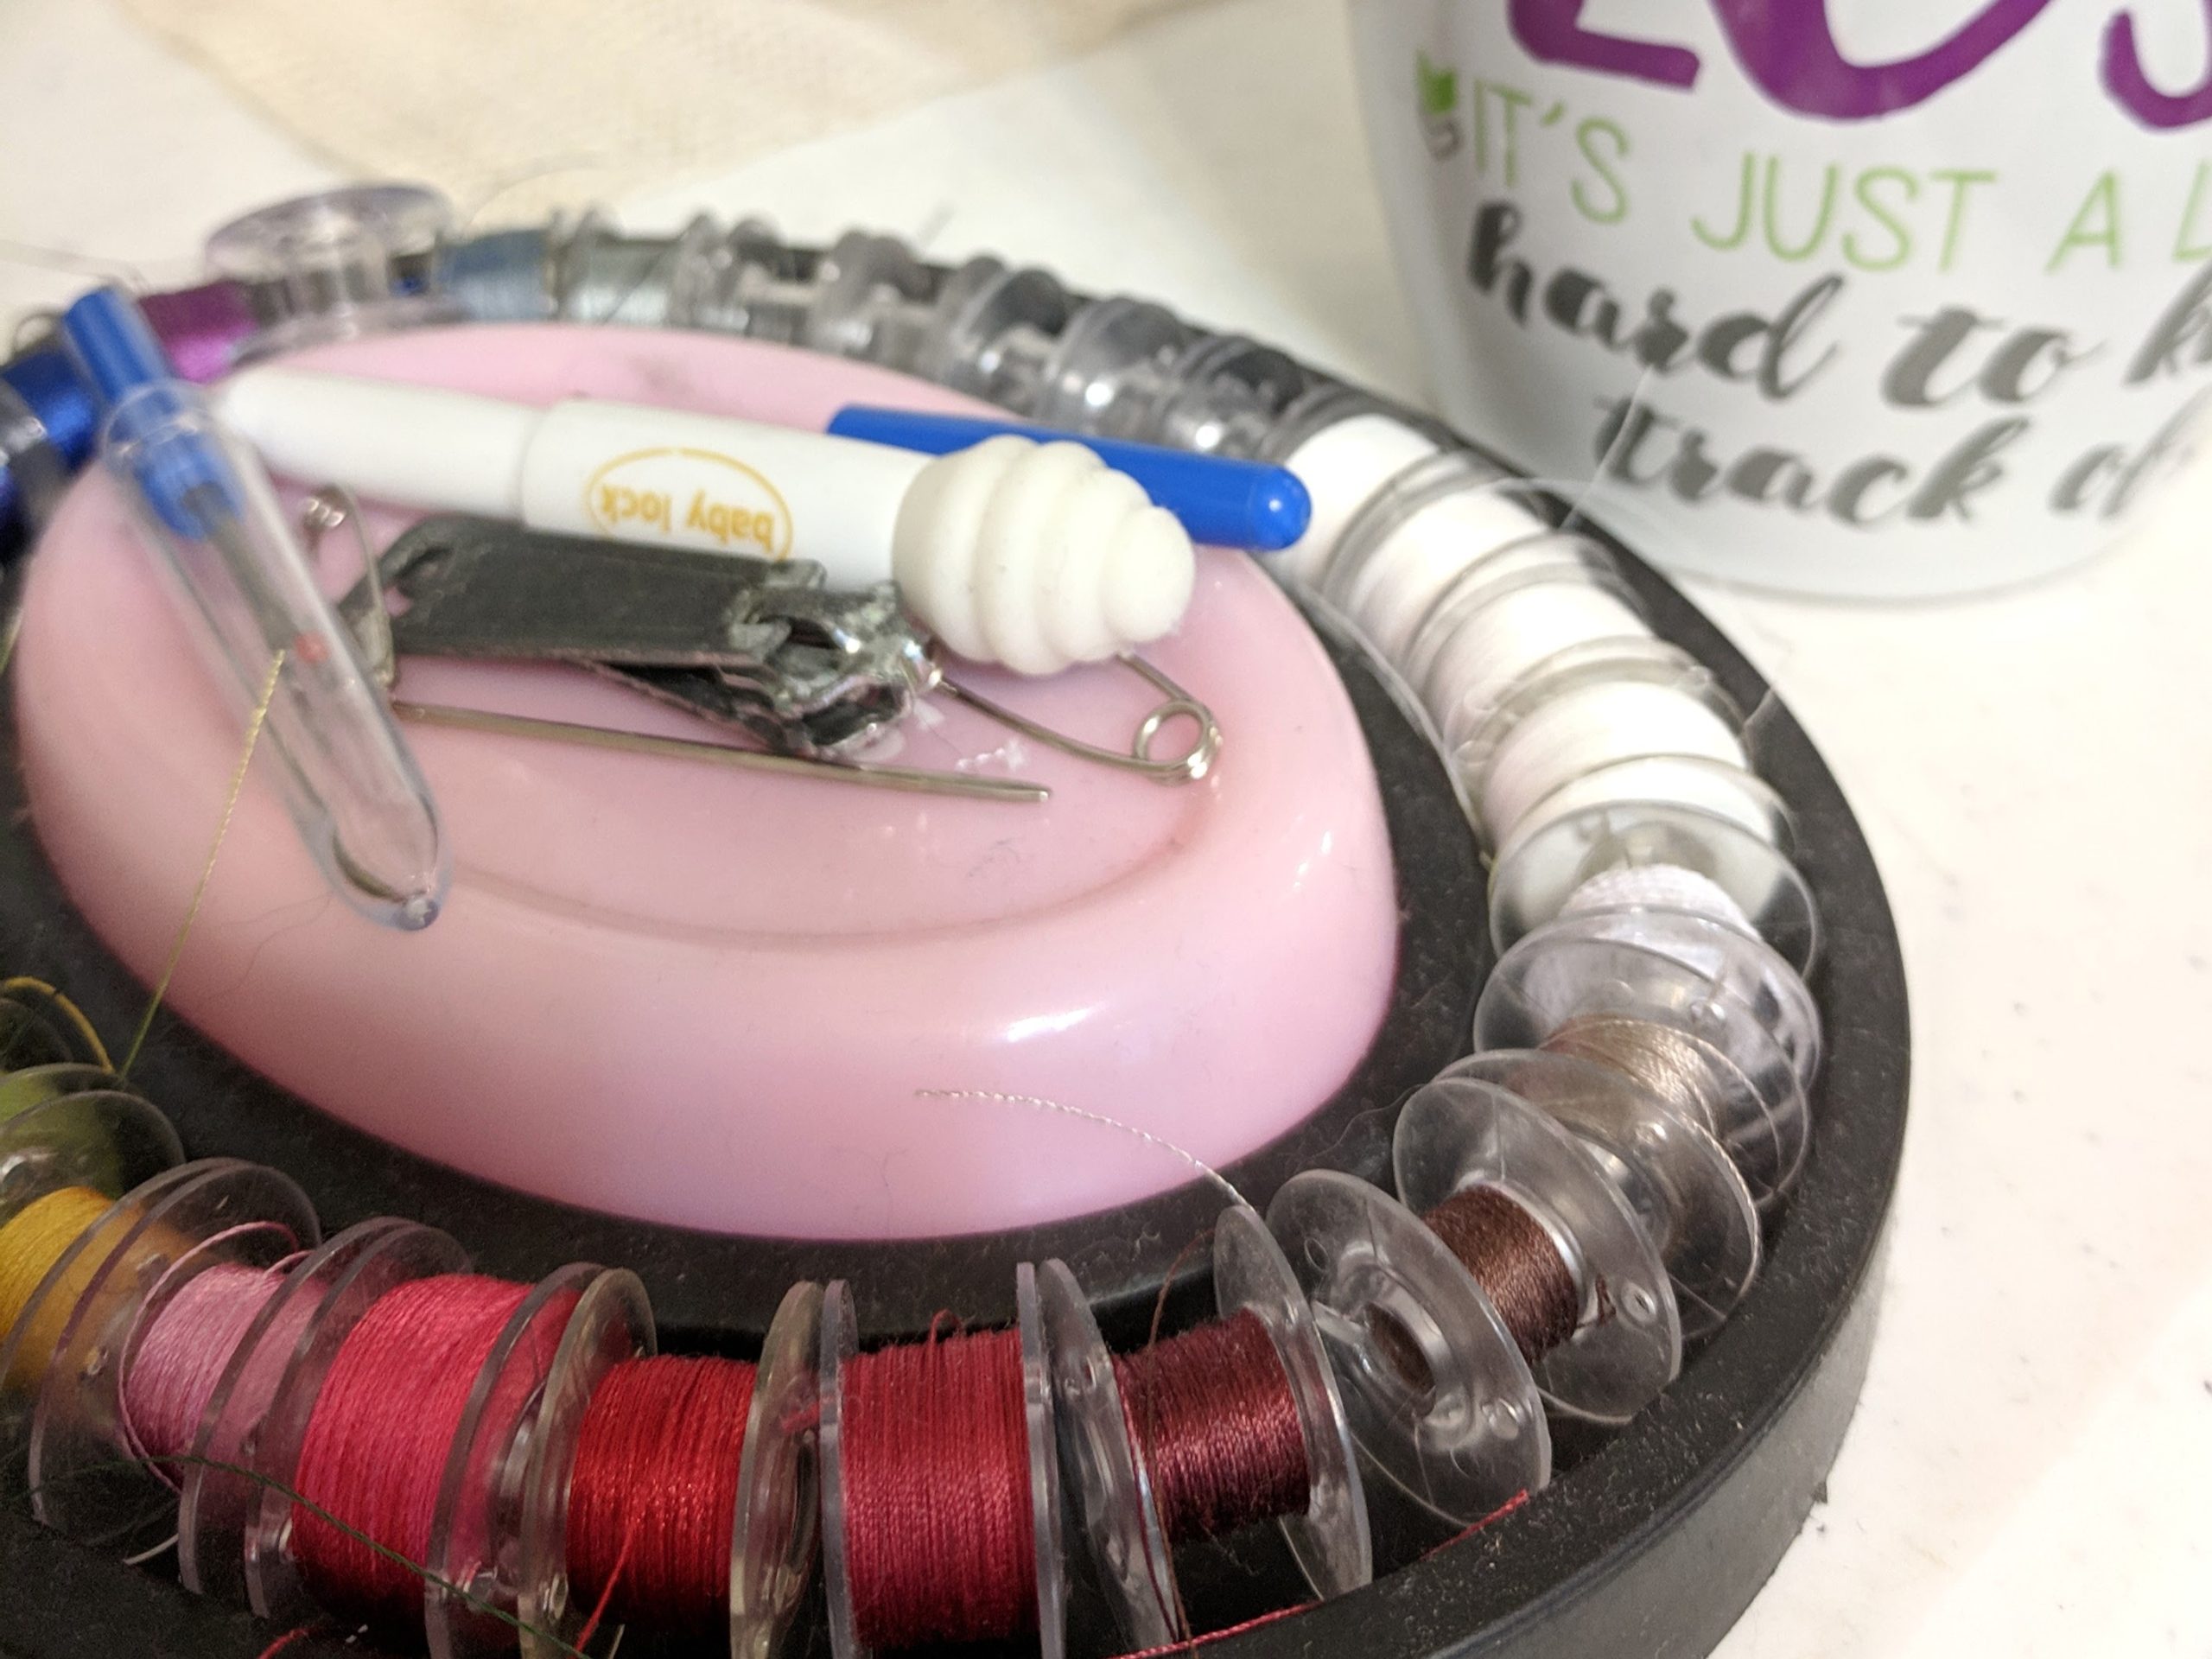
Ready to try out a sewing class? You’ll need a few basic supplies. Take a look at the beginning sewing supplies you’ll need:
Category Archives: Being Creative
Fostering creativity through sewing and other hobbies
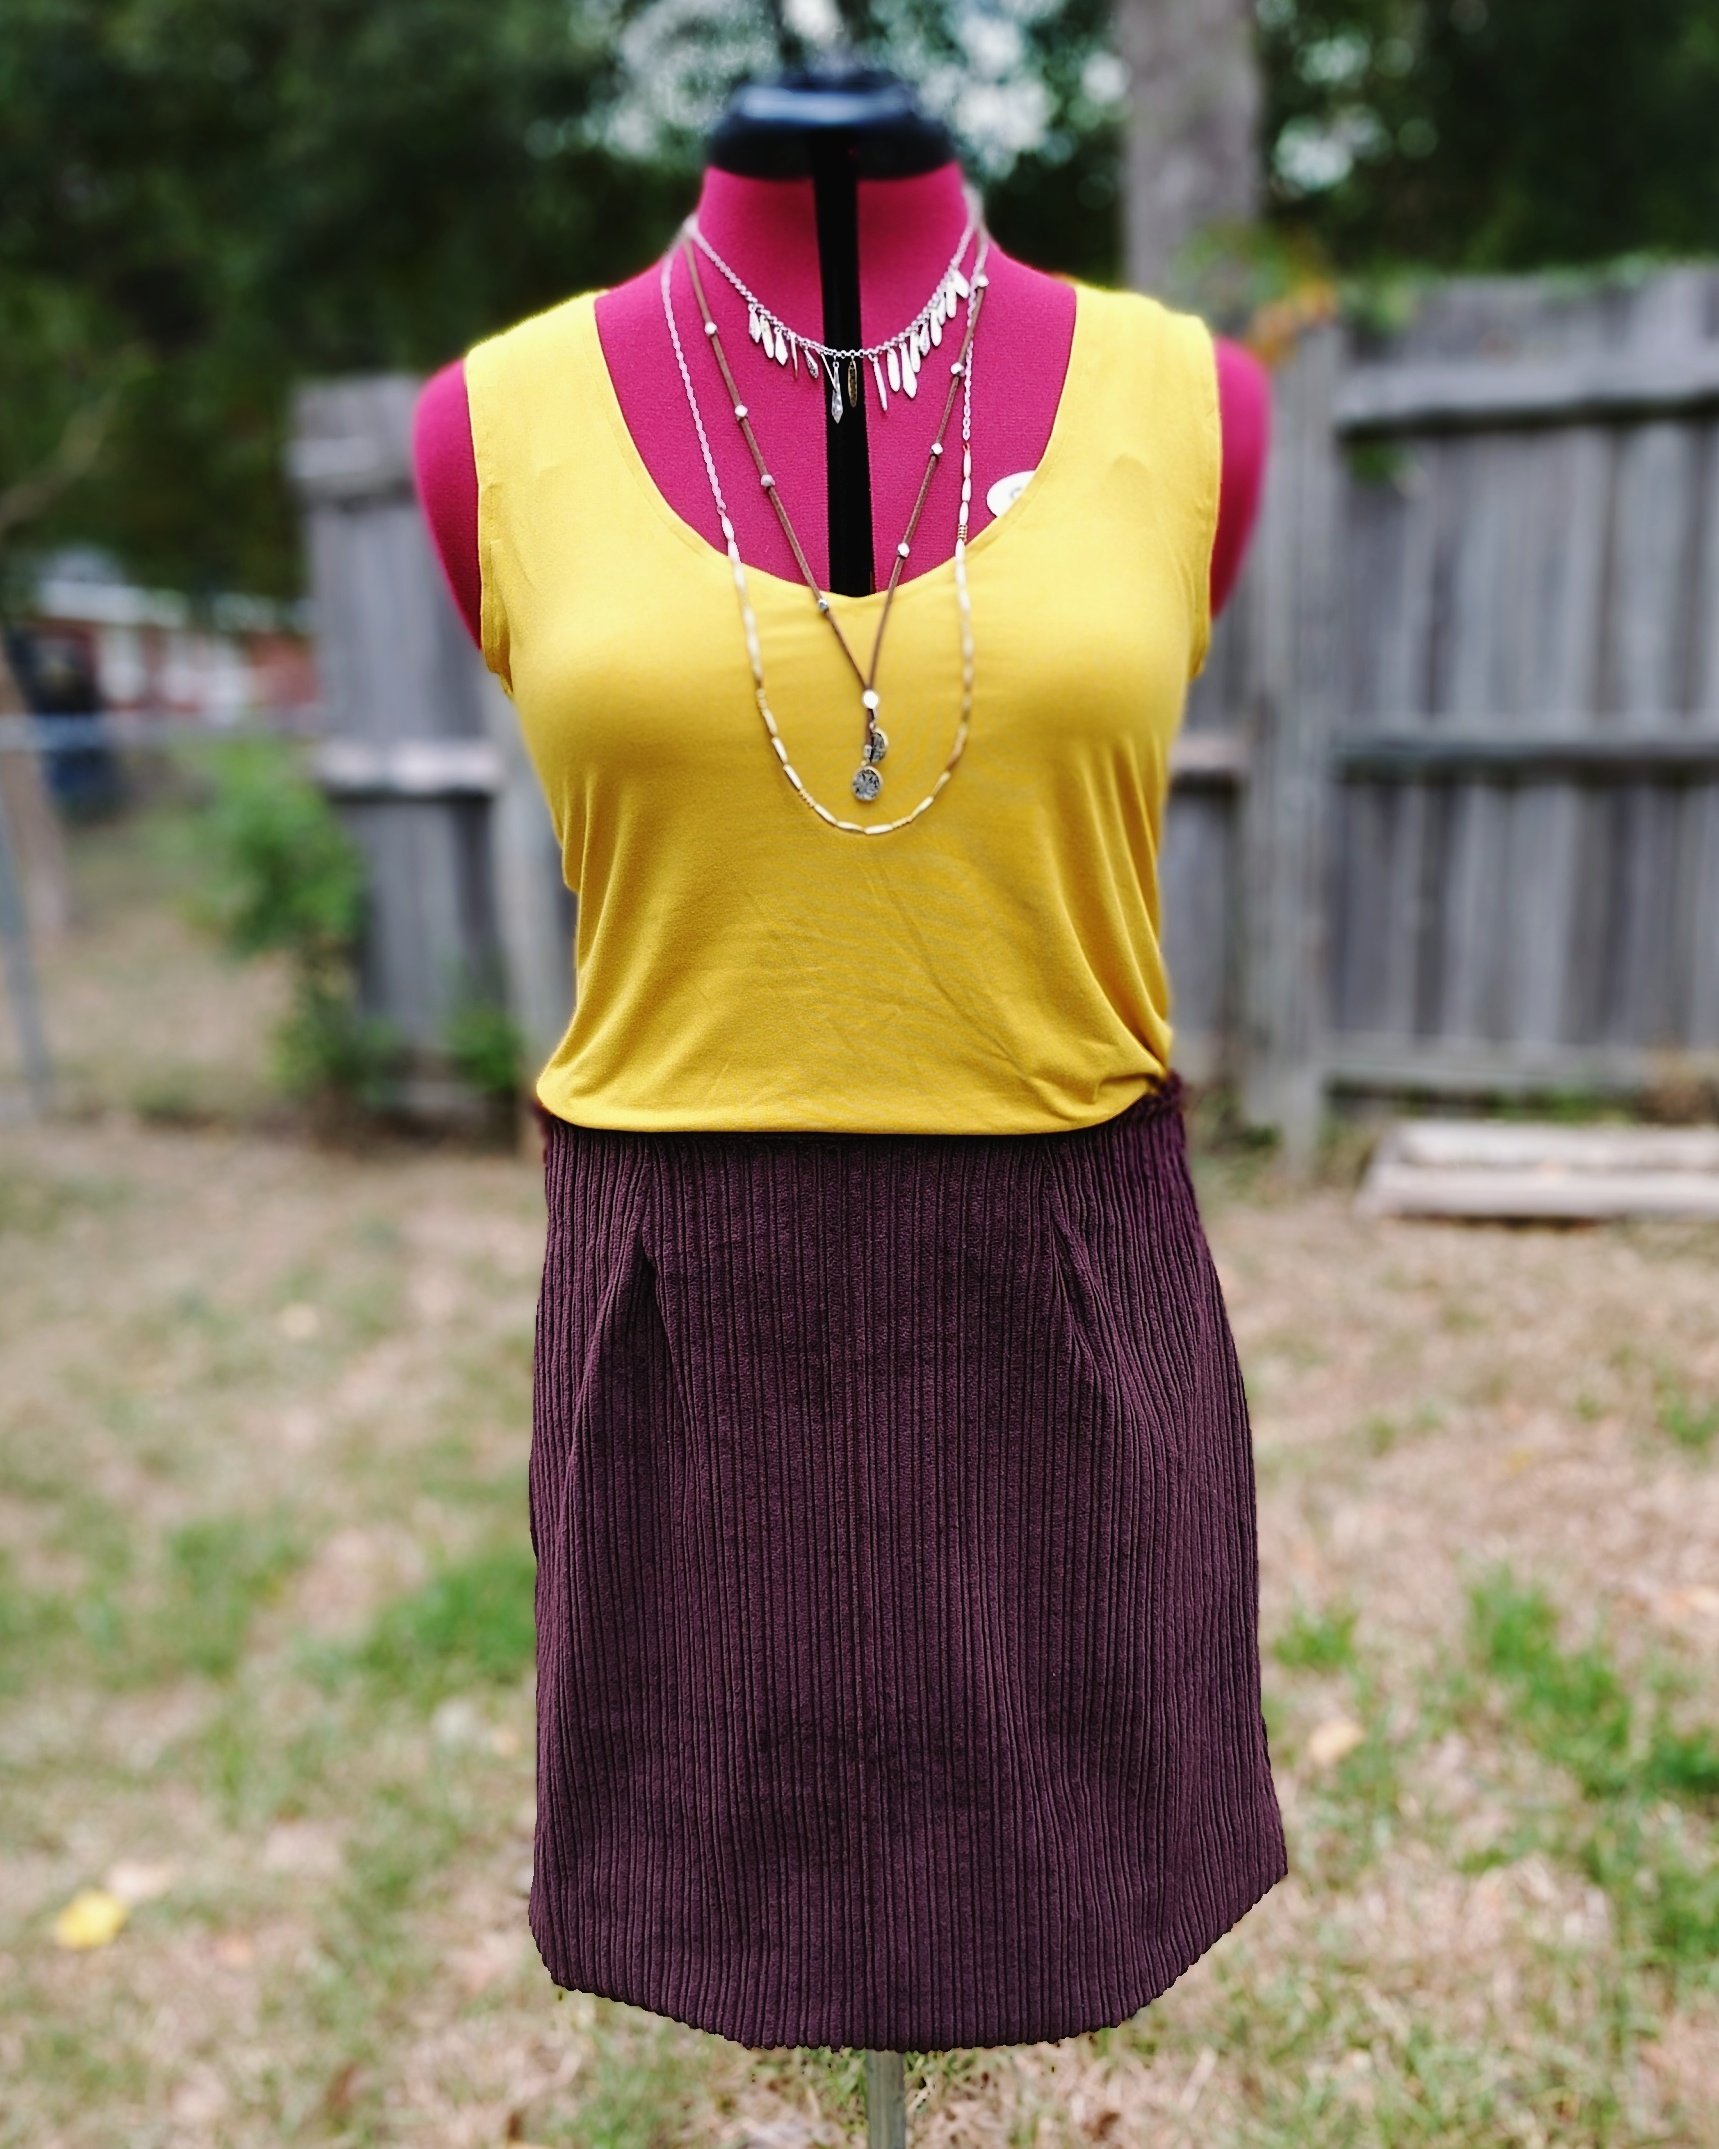
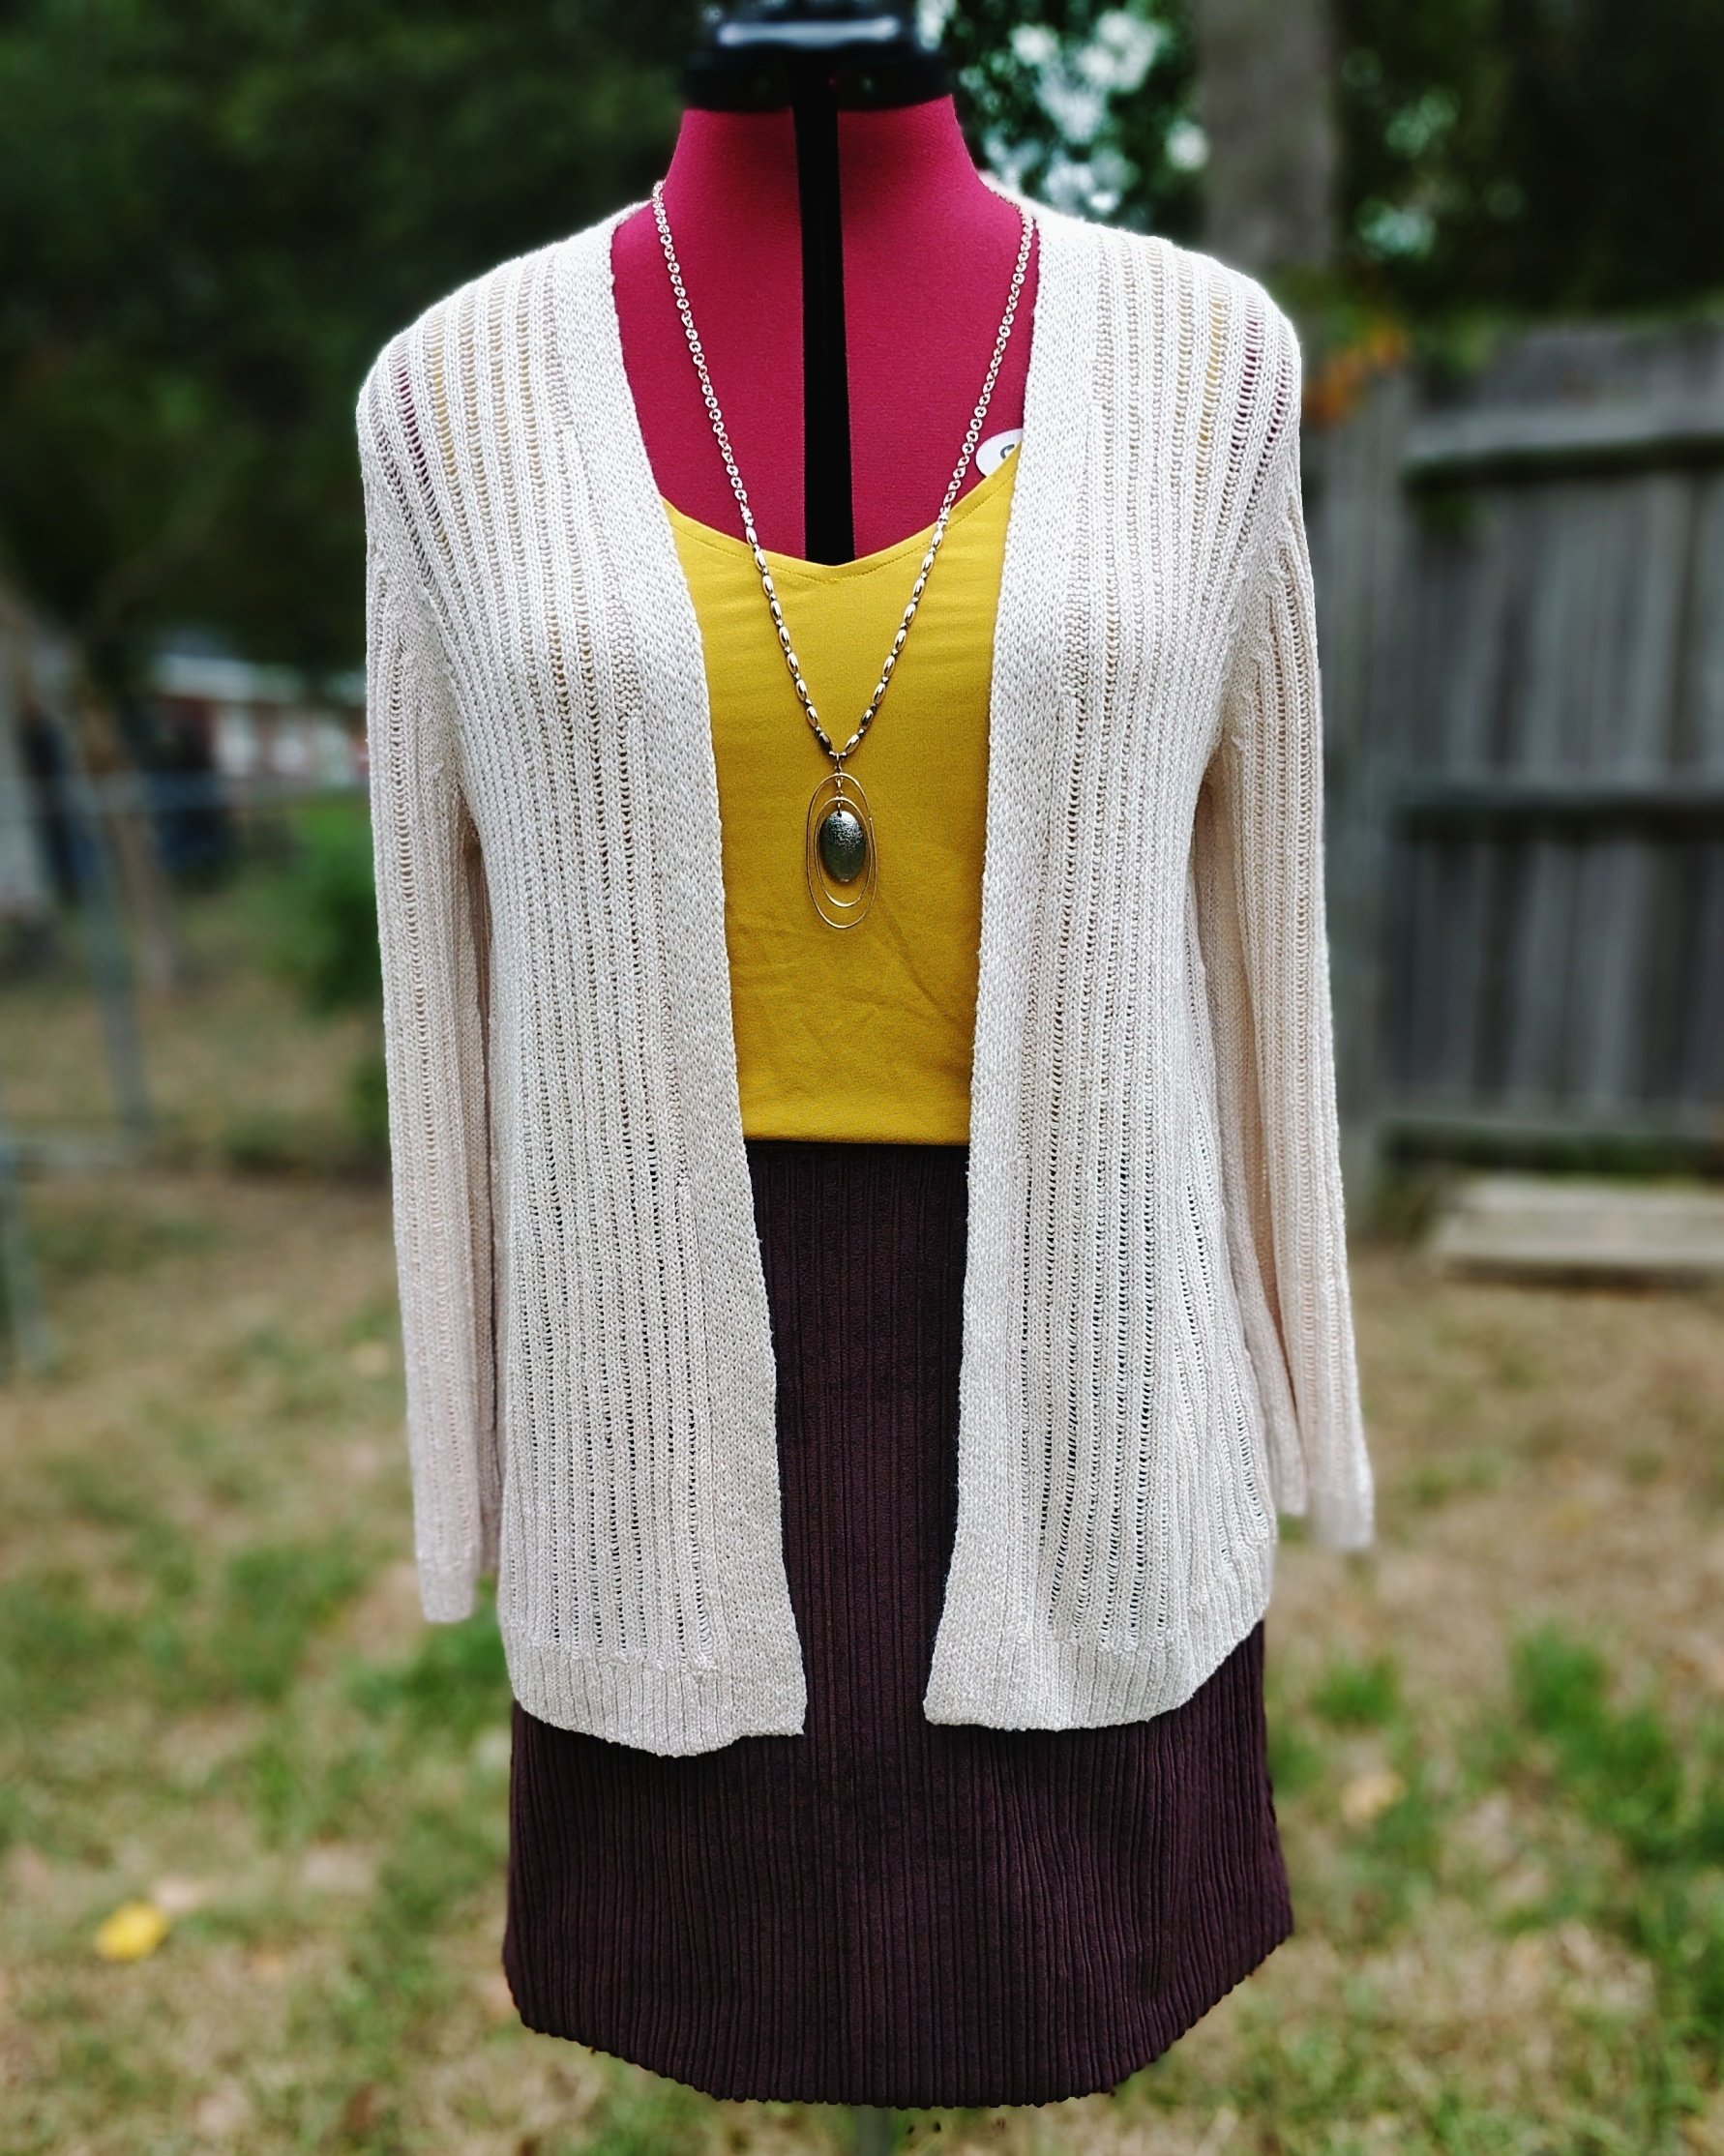
Style Arc Diana Top
Piece #2 in my fall wardrobe capsule is complete: Style Arc’s Diana Top.
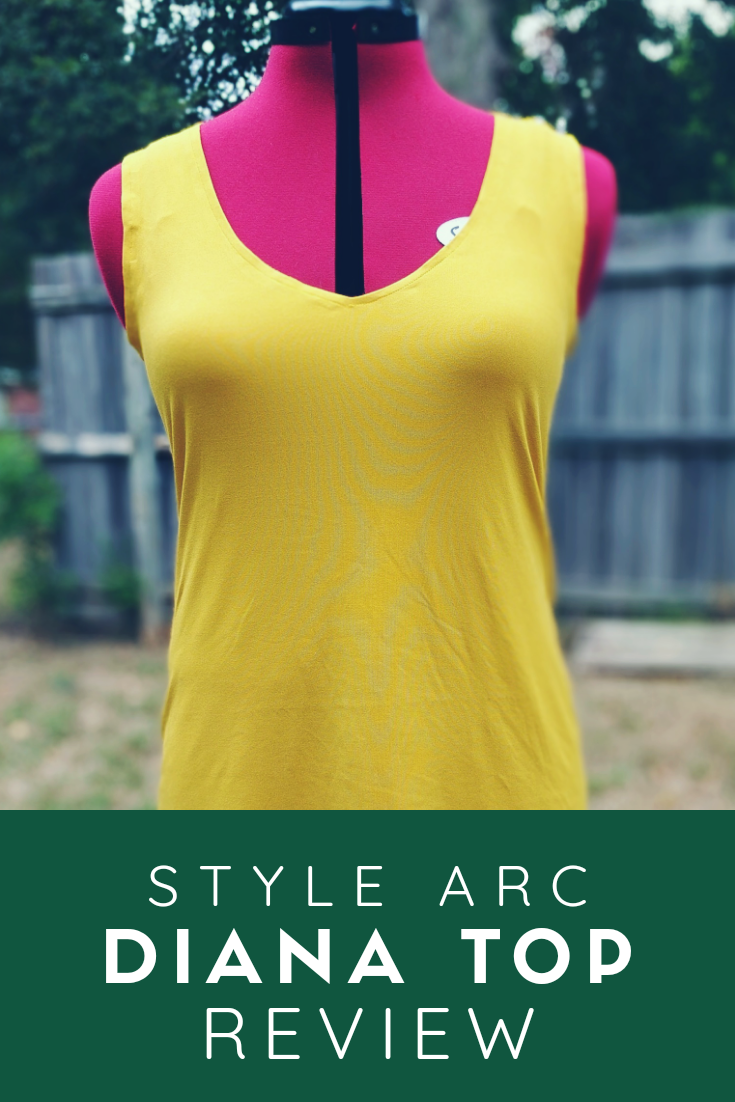
Fall in the South means hot, hot, hot weather until at least October. But I’m jealous of all y’all wearing beautiful fall colors. So, when I was thinking about a fall capsule wardrobe, I wanted lightweight tops in beautiful fall colors. Enter a piece of mustard DBP in my stash and the Diana Top.
Pattern Review of Style Arc’s Diana Top
Description: Attractive neckline slightly fitted top
(You should know here that Style Arc Patterns are known for their brevity. That includes construction instructions.)
Pattern Pieces: I purchased the PDF format. The download was simple and the pattern taped together easily. I recommend that you print page 3 of the PDF first. This page has a square to measure to make sure your pattern is printing at the appropriate size. Make sure you printer is not set to “Scale to Fit”.
Fabric: The pattern suggests stretch jersey or knit singlet. I used a Double Brushed Poly from So Sew English. The fabric is super soft, a bit clingy, and a little bit warm.
Sizing: Style Arc sells their designs in single sizes. When you order, you get the size you ordered, plus the sizes on either size of that. Per their sizing chart, I always order a size 10. I also received sizes 8 and 12 in my downloads. I cut a size 10 in this pattern. The only change I made was to lengthen the pattern by 4 inches for a longer tank.
Construction: Again, I will point out that Style Arc has very brief construction instructions. In fact, they only list 8 steps for this garment. For that reason, I wouldn’t recommend this pattern to a very new sewist. But, it still was a simple sew.

This piece can be put together with a serger or a sewing machine. I used my sewing machine with a stretch needle and a stretch stitch. It’s a simple tank, so it’s just stitching the sides and shoulders together, and them hemming the neckline, armholes, and bottom.
Just a note, the pattern instructions tell you to “Fold under the neckline hem”. I had to pull out the hem gauge and measure the pattern edge to the fold line to see exactly how deep that hem should be. Not anything difficult, just one of those things that might not occur to a brand new sewist.
I enjoy Style Arc patterns because they fit me! The are designed for rectangles like myself. I’m finding lots of newer independent designers are drafting for pear or hourglass shapes and that’s just not my body shape.
Would I recommend this pattern?
Absolutely, to anyone with a bit of experience. Again, it’s not a difficult sew, but the instructions are sparse. I’ve stitched up 5 different Style Arc patterns and I’ve been pleased with them all.
Would I recommend this fabric?
Well, maybe. Personally, I don’t love double brushed poly. Yes, it is super soft, but it can be clingy and hot. It can also be challenging to sew with, but a walking foot, a stretch stitch, and, most importantly to me, a stretch (not jersey or elastic) needle, the task is much simpler.
I would also highly recommend the fabric shop So Sew English. I found them on Facebook were they post bundles and updates very regularly. Shopping was quick and the fabrics I’ve ordered have been exactly what I was looking for.
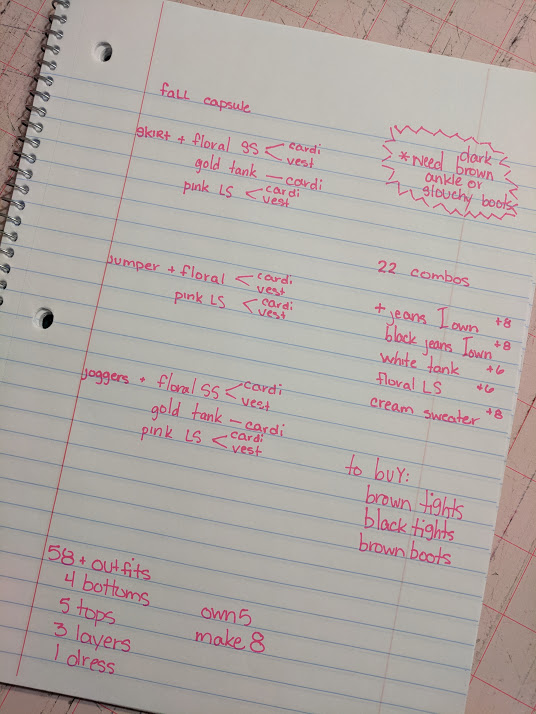
Fall Wardrobe Capsule Sewing Plan
Fall Wardrobe Capsule Sewing Plan? Seriously, you need a plan?? Yes, Yes I do.
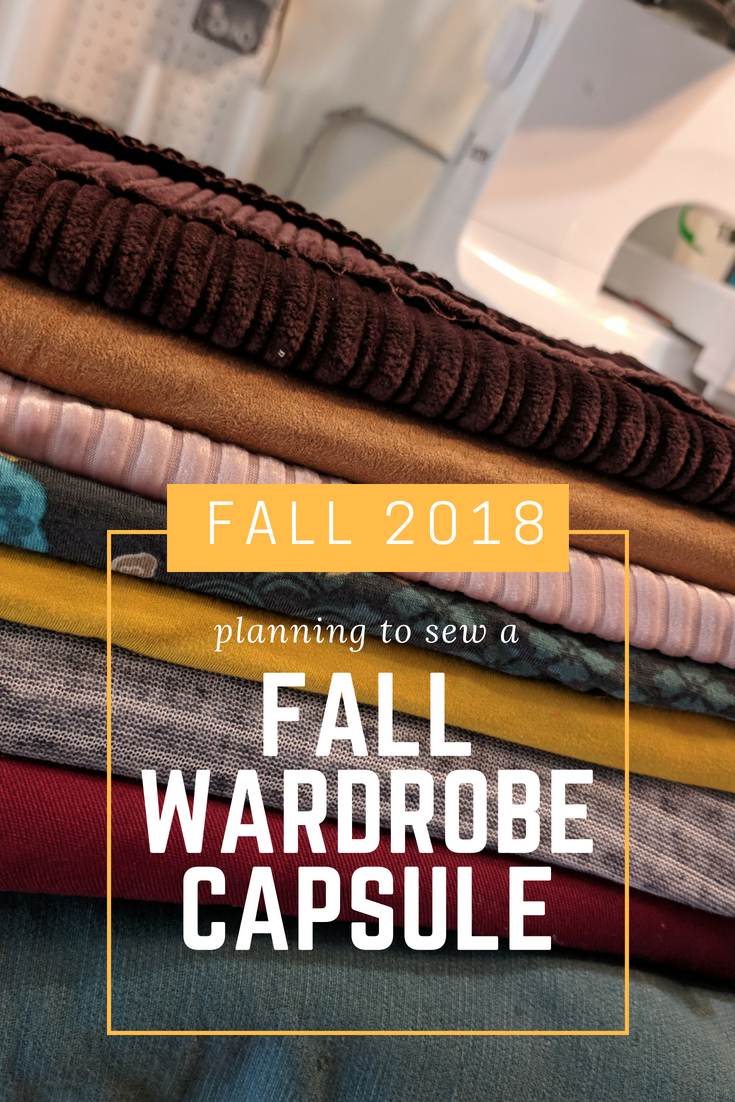
Since I only have limited time to sew for myself, I really ought to make the most of it. To do that, I need a to-do list, or a sewing plan. Here’s my plan for this fall, including links to the patterns I’ll use:
- 2 bottoms: A-line skirt and Hudson Pant
- 3 tops: Lane Raglan (LS), Layer Me Up tee (SS), Diana tank
- 2 layers: Grandpa Cardi and Dropje Hooded Vest
- 1 dress: SS Jumper to be worn over shirts (pattern TBD)
I’ve stitched up all these patterns before except the vest. The Lane Raglan is my absolute fav! The others all stitch up nicely. They are all pdf patterns, but don’t let that scare you.
Here are the fabrics:

And here’s how it will all work together:
Sewing Vintage Patterns: 1960

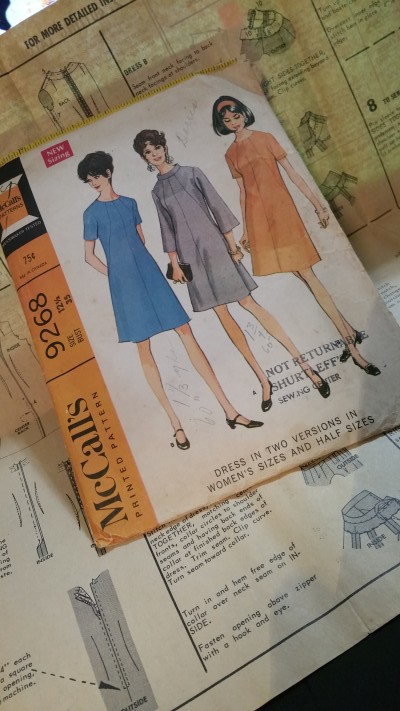
I have a handful of sewing patterns from my Grandma’s stash. I pulled them out the other day for inspiration and noticed that the sizing on some of them looked as though it might fit me. Jackpot! I decided it was time for me to begin sewing vintage patterns.
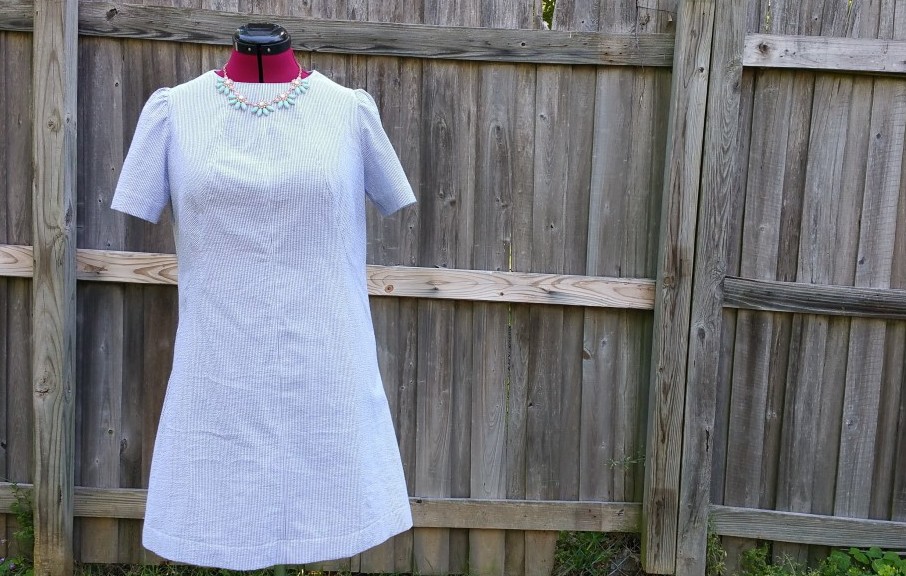
I love seersucker. I’ve sewn up seersucker for many, many babies, but I’ve never sewn up seersucker for myself. It was about time. I decided that the shift in McCalls 9268 would be the perfect match to my navy mini-stripe seersucker.

Review of McCall’s 9268, copyright 1968
From the pattern envelope: A-line dress, lightly shaped by center and side front seaming and vertical back darts, has center back zipper. Dress may have short or three quarter length set-in sleeves, and may be underlined. Short sleeved dress has faced and interfaced neck, side front seams may be stitch trimmed. Dress with faced bell sleeves has bias band collar included in neck facing seam. Collar and neck are interfaced.
I’m certain my copy of this pattern is my grandmother’s as it has her name written on the front along with notes about how much 60″ fabric she’d need to stitch it up. The tissue has been cut out and a pattern layout for view A is circled. I decided to make an underlined version of view B.
Pattern Sizing
One difference in vintage patterns and today’s patterns is the sizing. Most patterns today are multi-sized patterns, because frankly, most of us don’t fall into one size. This pattern is a single size-12 1/2. It is considered a “half size”. Here’s how the sizing chart compares:
- Pattern from 1945, size 12: Bust-30, waist-25, hip-33.
- Pattern from 2016, size 12: Bust-34, waist-26.5, hip-36
- Pattern from 1968, size 12 1/2: Bust 35, waist-28, hip-37
Those measures are very close to mine, so I didn’t make any changes to the sizing before I stitched it up. Next time, I’ll decrease the bust by about 1/2 an inch. After putting the dress on, I did taper the side seams about 1/2 an inch at the waist.
Don’t let a single size pattern scare you off. If your largest measure matches, you can tweak the rest of the pattern to fit you. For this dress, I knew my hips would fit and with all the other seams, adjusting for the chest and waist was no problem.
Details, Details, Details

Details are key in vintage patterns. A great feature of this pattern is the shoulder dart. The dress has interesting front seams that wrap to the sides. These are similar to princess seams and make the dress easy to alter.

The pattern instructions have topstitching on either side of every seam. This step is a must as it is a detail that just makes the dress. I top-stitched the center front, the front side seams, and the side seams.
Finishing seams

I finished my seams the way my grandmother always did. I finished the neck facing with a zig-zag stitch. Then I used my pinking shears on the my seam allowances.
Underlining

My grandmother tried to teach me that the inside of my garment should be as neat as the outside.
One other note: I was slightly afraid of lining the dress completely. This pattern has you baste the underlining and the main fabric of each piece together and then stitching your dress up, treating both pieces as one. Piece of cake.

So what did we learn about sewing vintage patterns?
- Don’t be scared off by single size patterns.
- Vintage patterns have great details.
- Put up your serger and finish your garment the old fashioned way.
- Make the inside of your garment as pretty as the outside.
- Underlining is easy. And necessary.
Tell me? How many of your mom’s, grandmas’s, or other vintage patterns do you have? Have you tried one yet? What’s stopping you?
Pocketful of Posies Dress
I love a great dress. Something easy to wear, something comfortable, something easy to move in, something with pockets! When I first saw the Pocketful of Posies Dress on Indiesew, I knew I wanted to stitch it up.
I had a little trouble finding a fabric I liked, but when I did, this was the result:

Oh my goodness! How fun! This dress is so much fun to wear. The pockets are perfection.
Just a few notes about it’s construction:
- The pattern pieces taped together easily. I cut a medium. I probably could have gone a size smaller, but I wasn’t sure. Except in the arms. The sleeves are just about right. Any smaller and I think they’d be too small.
- The instructions are easy to follow. I used my serger for most of the construction, but a beginner could do just as well with a stretch stitch on the sewing machine.
- I cut off about 4 inches in length. I’m short. I should have added a little length to the bottom band so I wouldn’t have gathers, but I was out of fabric. I used every single square inch I had.
- The neck line is low. Next time, I’ll raise it about 2 inches. To do that, I’ll have to modify the front, the pockets, and the side panels.
- The thick neck band didn’t work for me, so I removed mine and made it half the width.
My Favorite HandMade Christmas Gift: Dish Towels
")
I love the look of a hand-embroidered dish towel. They are sweet, and the perfect project for teacher gifts, wedding showers, and even to compliment a gift of baked goods. These projects only take a few supplies and can be completed while waiting on carpool or watching TV at night, making these sweet dish towels the perfect handmade Christmas gift.
You’ll need:

- a hoop
- thread
- a design
- a pencil
- embroidery needles
- thread
You can purchase iron-on designs, or just draw your own. In the past I’ve downloaded a line drawing and just traced it onto my towels. This is super-easy if you have a large window. You can tape the design to the window and use the sunlight to see the design through your towel fabric.
I’m a lazy stitcher, so I tend to only use a basic running stitch and french knots to complete my design. This website has some great tutorials: http://sublimestitching.com/pages/tutorials