Fall Wardrobe Capsule Sewing Plan

Fall Wardrobe Capsule Sewing Plan? Seriously, you need a plan??  Yes, Yes I do.

fall wardrobe capsule sewing plan

Since I only have limited time to sew for myself, I really ought to make the most of it.  To do that, I need a to-do list, or a sewing plan.  Here’s my plan for this fall, including links to the patterns I’ll use:

I’ve stitched up all these patterns before except the vest.  The Lane Raglan is my absolute fav! The others all stitch up nicely.  They are all pdf patterns, but don’t let that scare you.

Here are the fabrics:

fall wardrobe capsule sewing plan

And here’s how it will all work together:

fall capsule wardrobe sewing plan

Summer League Swim mom Survival Guide

SWIM MOM (1)

Updated for 2016!

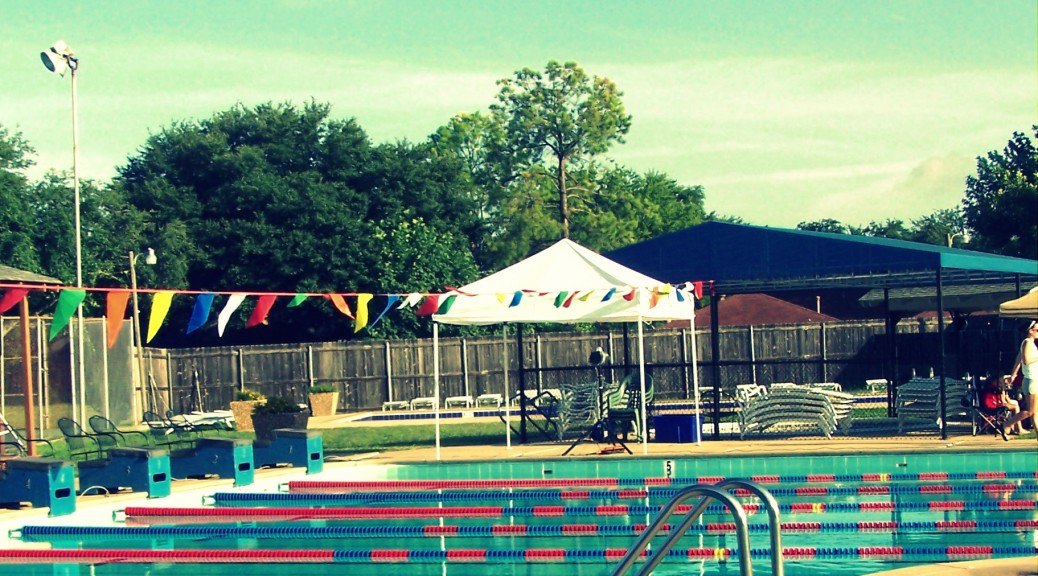
I love Summer League Swim Season.  These short 5 weeks were our foray into the world of swimming.  Whether your child is just swimming for fun or your child springboards from here into competitive year-round swimming, summer league swim is a time to relax, cheer for your child, and enjoy the summer.

What you need to bring:

  • Team Suit
  • Goggles
  • Swim Caps
  • Towels (I like to have at least 2 per child.)
  • Sunscreen
  • Highlighters
  • Sharpies
  • Cash
  • Water
  • Chairs and/or picnic blankets
  • Snacks that won’t melt (try frozen grapes, granola, or rice crispy treats.)
  • Something to do: tablets, kindles, games, coloring books…

100_2260-001

What you need to do:

1.  Slather on the sunscreen before you leave the house.  Load up.  Don’t forget your team suit, cap, and goggles.  If you need to purchase anything, I always recommend swimoutlet.com.  They are fast and the best prices I’ve found for my kids’ supplies.  When you are shopping, the boys’ suits are called “Jammers”.  The girls’ are just competition suits.  These are my favorite goggles.*

100_2289-007

2.  Arrive at least 15 minutes before warm-ups begin.  Your child needs to check in with his coach.  This also gives you time to set up a spot for your family.  Chairs, blankets, games, ice chests, etc.

100_2293-011

3.  Buy a heat sheet.  You’ll need the cash to purchase a heat sheet.  This is your guide to the meet.  Find your child’s name and highlight it.  Your child will swim more than one race, so don’t miss any.  Also, check the relays.  If your child is listed on a relay, you don’t want to miss it!  Three other swimmers are counting on you!

Each event or race is numbered: 1, 2, 3, etc.  Within each event, swimmers are divided into groups of 6 or 8 to swim heats.  The heats are arranged slowest to fastest.  (The slowest 6 will swim the first heat.  The fastest 6 will swim the last heat.)  Within the heat, the swimmers are assigned a lane.  The fastest swimmers in the heat are in the middle lanes.

100_2292-010

4.  Determine what race, heat, and lane  (R, H, L) your swimmer is in.  Use a sharpie to write the RHL on your child’s arm.  When my kids were little, I wrote on their upper arm.  Now that they are old enough to line up by themselves, I write it on their forearm so they can read it.

100_2287-005

5.  Volunteer.  Swim meets run because of parental involvement.  All clubs need parents to help time.  This is the easiest job.  You just push “Start” on a stop watch when the buzzer sounds and push “Stop” when the swimmer in your lane touches the wall.   Timers sit behind the starting blocks, so these are the best seats in the house!

Some clubs need parents to volunteer to run snack shacks, help line children up for races, or as runners.  Find out where you need to be.

I’ll be honest.  Volunteering is not really an option.  These meets can not proceed without enough help in place and your team’s coach will appreciate all your help.

IMG_7239-003

6.  Slather on the sunscreen.

7.  Teach your child how to follow along.  Some clubs have volunteers that will call small children to line up.  If yours doesn’t, you need to keep track of which event is in the water.  You child needs to line up 2 events before  theirs.

8.  Drink plenty of water.

9.  Slather on the sunscreen.

10.  Cheer for your child.  You are there to cheer them on, not coach them.  The coach will do that.  And remember, the goal in swimming is not to win.  The goal is drop time.  That means that every time your child swims a 50y freestyle, they want to swim it faster than before.

100_2302-020

11.  Last but not least, slather on the sunscreen.

Updated with a few more thoughts from my friend Angie, a former swimmer and current swim mom and coach.  Thanks Angie!

  • Make a new swim mom friend (sometimes this will become your best friend)
  • Be very impressed with your kids.  Swimming is HARD.  Most moms couldn’t do with their kids are doing, especially in those early May hours when the water is 76 degrees!
  • DQs (Disqualifications) and tears may go hand-in-hand but a hug, a high five, and encouragement to try again are all they need.
  • A 6-8 year old that can do a legal butterfly or breaststroke is a special gift to a summer league coach.  Be very impressed!
  • The true sign of a swim mom is the wet mark that’s left behind on Mom’s dry t-shirt after a hug from her swimmer.

I’d love to hear your summer swim experience.  Any questions or tips and tricks?

*These are affiliate links.  If you purchase through them, you are supporting this blog and helping me purchase my kids’ year-round competition needs.  Thank you so much!

Sewing Vintage Patterns: 1960

image

I have a handful of sewing patterns from my Grandma’s stash. I pulled them out the other day for inspiration and noticed that the sizing on some of them looked as though it might fit me. Jackpot! I decided it was time for me to begin sewing vintage patterns.

Sewing Vintage Patterns

I love seersucker. I’ve sewn up seersucker for many, many babies, but I’ve never sewn up seersucker for myself. It was about time. I decided that the shift in McCalls 9268 would be the perfect match to my navy mini-stripe seersucker.

image

Review of McCall’s 9268, copyright 1968 

From the pattern envelope: A-line dress, lightly shaped by center and side front seaming and vertical back darts, has center back zipper. Dress may have short or three quarter length set-in sleeves, and may be underlined. Short sleeved dress has faced and interfaced neck, side front seams may be stitch trimmed. Dress with faced bell sleeves has bias band collar included in neck facing seam. Collar and neck are interfaced.

I’m certain my copy of this pattern is my grandmother’s as it has her name written on the front along with notes about how much 60″ fabric she’d need to stitch it up. The tissue has been cut out and a pattern layout for view A is circled. I decided to make an underlined version of view B.

Pattern Sizing 

One difference in vintage patterns and today’s patterns is the sizing. Most patterns today are multi-sized patterns, because frankly, most of us don’t fall into one size. This pattern is a single size-12 1/2.  It is considered a “half size”.  Here’s how the sizing chart compares:

  • Pattern from 1945, size 12:          Bust-30, waist-25, hip-33.
  • Pattern from 2016, size 12:          Bust-34, waist-26.5, hip-36
  • Pattern from 1968, size 12 1/2: Bust 35, waist-28, hip-37

Those measures are very close to mine, so I didn’t make any changes to the sizing before I stitched it up. Next time, I’ll decrease the bust by about 1/2 an inch. After putting the dress on, I did taper the side seams about 1/2 an inch at the waist.

Don’t let a single size pattern scare you off. If your largest measure matches, you can tweak the rest of the pattern to fit you. For this dress, I knew my hips would fit and with all the other seams, adjusting for the chest and waist was no problem.


Details, Details, Details

image

Details are key in vintage patterns. A great feature of this pattern is the shoulder dart. The dress has interesting front seams that wrap to the sides. These are similar to princess seams and make the dress easy to alter.

image

The pattern instructions have topstitching on either side of every seam. This step is a must as it is a detail that just makes the dress. I top-stitched the center front, the front side seams, and the side seams.

Finishing seams

image

I finished my seams the way my grandmother always did. I finished the neck facing with a zig-zag stitch. Then I used my pinking shears on the my seam allowances.

Underlining

image

My grandmother tried to teach me that the inside of my garment should be as neat as the outside.

One other note:  I was slightly afraid of lining the dress completely.  This pattern has you baste the underlining and the main fabric of each piece together and then stitching your dress up, treating both pieces as one.  Piece of cake.

image

So what did we learn about sewing vintage patterns?

  • Don’t be scared off by single size patterns.
  • Vintage patterns have great details.
  • Put up your serger and finish your garment the old fashioned way.
  • Make the inside of your garment as pretty as the outside.
  • Underlining is easy. And necessary.

Tell me?  How many of your mom’s, grandmas’s, or other vintage patterns do you have?  Have you tried one yet?  What’s stopping you?

Savoring PlayTime: Nerf Gun Storage

20160409_084416

When you have a boy, you have a mess.  All the time.  Cars, Legos, and Nerf Guns, oh my!  I’m a big believer in letting kids play.  I’m also a very, casual housekeeper, but sometimes, you just have to clean it up! And by you, I mean the boy-child who made the mess.  Here’s our solution to enjoying an easy clean-up after an epic Nerf Gun battle:  an over the door shoe bag turned Nerf Gun storage.

Nerf Gun storage

I picked up this black shoe organizer at the Family Dollar.  You can get them at just about any store and just about any price point.  I doctored ours just a little bit.

Nerf Gun storage

I added an elastic loop over the top right pocket.  A few of our Nerf guns are taller and I didn’t want them to flip out of the pocket.  Here’s how:

Adding a loop to your Nerf Gun Storage bag

You’ll need:

  • 7 inches of 2 inch wide elastic
  • 2 inches of double fold bias tape
  • 2 snap sets
  • your sewing machine or a needle and thread
  • (You could do this with Velcro too, but I wanted the stretchiness of the elastic).

#1  Stitch 2 inch wide elastic (about 7 inches long) over the existing seam between the 2 far right pockets on the top row.  I placed the raw edge of the elastic up against the edge of the right pocket.  That way, the elastic will flip back over the seam. I used a stretch stitch.

Nerf Gun storage

#2 Use a small piece of double fold bias tape to re-enforce the right edge where the snaps will be. I didn’t stitch mine on.  Instead, I wrapped it around the edge and applied the snaps over it.

Nerf Gun storage

#3 Apply the snaps to the right edge so that the elastic can be unfastened, stretch around the larger Nerf Gun, and refastened. I don’t think it matters, but I always apply male ends of the snaps on the underside.

Nerf Gun storage

#4 Apply the coordinating snaps to the end of the elastic.

Nerf Gun storage


This Nerf Gun Storage bag was a birthday gift, so I finished it off with a little embroidery.  I was afraid the material wouldn’t hold up to many stitches, so I embroidered a piece of felt and stitched it on the top instead.

Nerf Gun storage

***Adam suggested I edit this to add that our house, the Nerf Gun storage bag is hung up on the wall, not the door.  It’s hung at about 5 feet, so that little ones can easily reach everything.  It is hung on screws that are anchored in the wall.  When it’s loaded, it gets pretty heavy and my favorite 3M strips just weren’t up to the task.  I should also add here that I have no affiliations with Nerf or Lego or even Velcro for that matter.  Just a boy-child and his friends!***

Isn’t it easier to savor playtime when the clean up is something the kids can do?  Now, will someone please tell me how to store all these Legos???

Savoring Family Time: How we Road Trip

How we Road Trip

I love a good road trip. In the past 3 years, we made 3 week-long trips of 2500+ miles. To travel anywhere out West, we have a full day’s drive across Texas. Plus, as a swim family we make at least one 3-6 hour trips each month. We’ve about got the road trip mastered. Here’s how we do it:

Make a tentative plan for your road trip.

We know where we plan to stop each night. We know our end destination. Sometimes, that’s all we know. Having a goal helps us track our progress.

How We Road Trip

Be free to change your plans.

On our most recent road trip, we watched the map and changed plans when we needed showers and laundry.

We’d planned to spend the night at Bottomless Lakes State Park, Oliver Lee State Park, somewhere in Carlsbad, Dog Canyon in Guadalupe Mountains, Big Bend somewhere (x2), and San Antonio somewhere. We actually stayed at Bottomless Lakes State Park, Oliver Lee State Park, Pine Springs in Guadalupe Mountains (x2), Stillwell Ranch (x2), and a San Antonio KOA. We changed our plans around Carlsbad and Guadalupe Mountains to give us a break from setting up and taking down the tent for a night.  We opted for Stillwell Ranch just outside of Big Bend because the campgrounds at Big Bend are booked solid during the end of March.  The KOA in San Antonio was chosen because we needed showers!!!

How We Road Trip

Brake for brown signs.

We love a good historical marker.  Or a cheesy tourist trap.  Christopher’s favorite stop on our DC road trip happened when we passed a road sign that said “Manassas/Bull Run”.  My exact comment was:  “Like the real Bull Run???”  After Adam confirmed it, we pulled in and spent a few hours exploring the famed battle grounds.  Last year, we discovered the beauty of the Painted Desert and Petrified Forest the same way.

How We Road Trip

During our last trip, a brown sign break took us to Lincoln City, NM, the place where Billy the Kid found infamy.  So neat, to remember that people of legend were also real people!

How We Road Trip

Picnic.


Road trips can be horrible on the diet and the stomach.  We tackle that with a little pre-planning.  We carry sandwich makings, chips, carrot sticks and cherry tomatoes, and trail mix.  And water, lots and lots of water. I have this great plastic bread box that keeps our bread from getting squashed.  We like Lays Stacks (in the plastic boxes) and Veggies straws for chips because they don’t get reduced to crumbs.  I also take extra plastic sacks for trash and a table cloth because you never know the condition of the picnic tables.  We will picnic at rest areas along the way, but we’ve also been known to make sandwiches on the tailgate while pumping gas.

How we Road Trip

Electronics.

This is a matter of personal preference for each family.  Here’s my take on it.  My kids are competitive swimmers.  Most weeks, they are in the water 10 hours a week, in addition to the 8 hours a day at school, church, and homework.  Electronics are used during the week for homework and reading.  That said, if they want to veg for a few hours in the car playing video games, I’m all for it.  They have no other time to enjoy games, so why not while driving through the never-ending expanse that is West Texas. I’ve found that kids self-monitor the time they are on the games.  During our past trip, they spent as much time reading as they did playing. I also keep Sharpies and notebooks handy, as much for my kids as for me!

How We Road Trip

Gas.

This one should be self-evident, but when you are traveling through rural areas (specifically West Texas, parts of NM, parts of Arizona, etc) know your mileage and know how much gas you need.  We’ve been known to stop every 100 miles to top off, just to be sure.

Savoring Family Time.

Road trips could be miserable, but they are also a great time to spend with family. They provide moments of experiencing just how witty our kids are. When the kids are buried in books and games, they provide Adam and I with time to visit. When the radio is on, I use the trip to brainstorm with my Sharpies and notebooks. Sights have lead to family conversations about science, history, politics, and God.

How We Road Trip

When was the last time you road tripped?  Any tips I need to know?

Pocketful of Posies Dress

I love a great dress.  Something easy to wear, something comfortable, something easy to move in, something with pockets!  When I first saw the Pocketful of Posies Dress on Indiesew, I knew I wanted to stitch it up.

I had a little trouble finding a fabric I liked, but when I did, this was the result:

IMG_0314

Oh my goodness!  How fun!  This dress is so much fun to wear.  The pockets are perfection.

Just a few notes about it’s construction:

  • The pattern pieces taped together easily.  I cut a medium.  I probably could have gone a size smaller, but I wasn’t sure.  Except in the arms.  The sleeves are just about right.  Any smaller and I think they’d be too small.
  • The instructions are easy to follow.  I used my serger for most of the construction, but a beginner could do just as well with a stretch stitch on the sewing machine.
  • I cut off about 4 inches in length.  I’m short.  I should have added a little length to the bottom band so I wouldn’t have gathers, but I was out of fabric.  I used every single square inch I had.
  • The neck line is low.  Next time, I’ll raise it about 2 inches.  To do that, I’ll have to modify the front, the pockets, and the side panels.
  • The thick neck band didn’t work for me, so I removed mine and made it half the width.

Home of Needles, Nuts, and Bolts Sewing Classes and Personality Children's Clohtes