Tag Archives: sewing

Book Review: T Shirt Quilts Made Easy

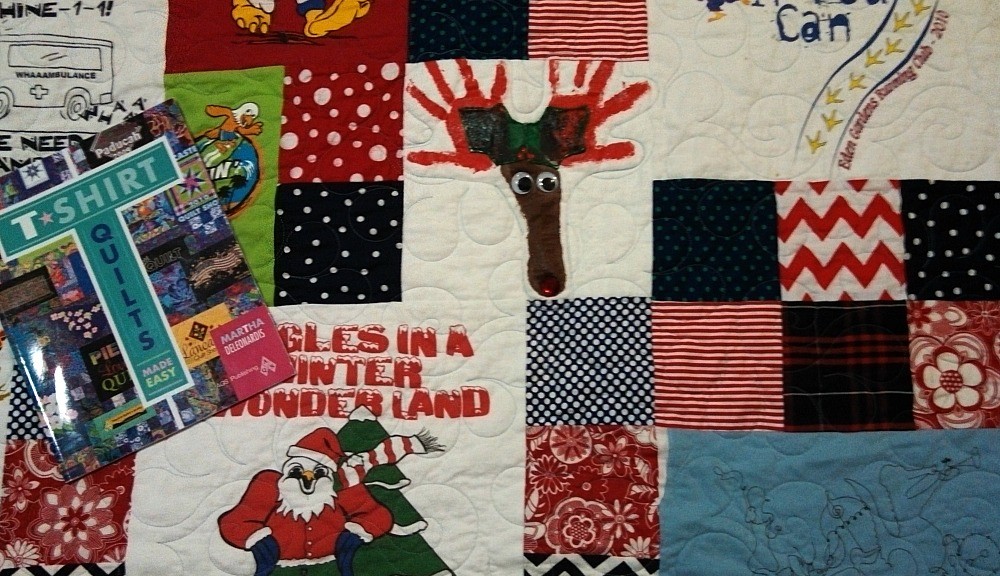
T Shirt Quilts Made Easy by Martha Deleonardis

Published in 2012

ISBN: 978-1-60460-014-8

Some Chapter Headings:

  • Hints and How-To’s
  • Projects
  • Gallery
  • Easy Planning Guides

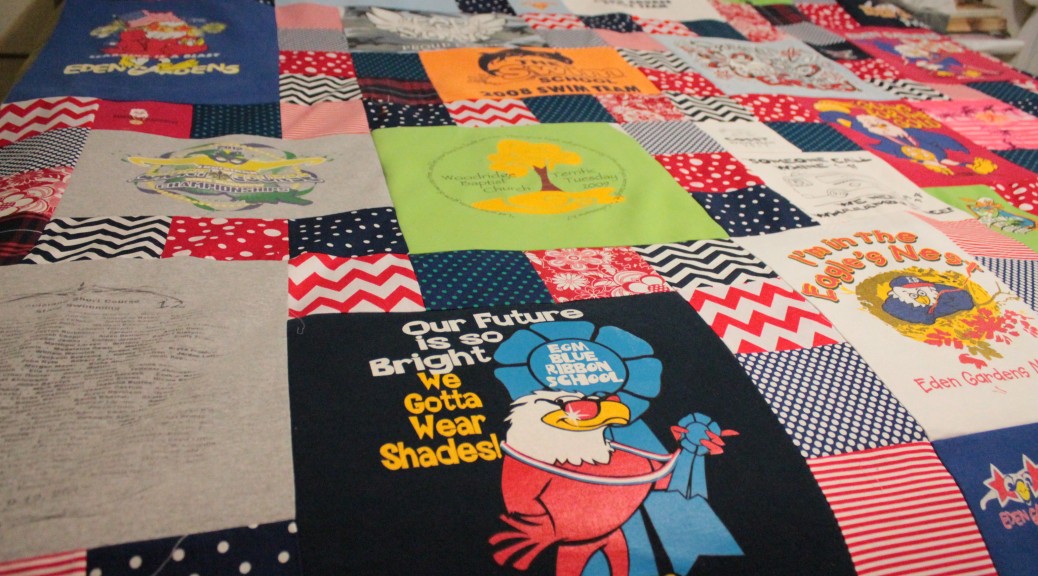
I should preface my review with this:  I borrowed this book from my mom when I was ready to make my daughter’s t shirt quilt.  I’m comfortable sewing and piecing quilt tops.  I was looking specifically for information about the coordinating fabrics, what size to cut the blocks, and how-to make all the blocks fit together.  This book did that.

I liked:

  • “It’s All About the Fabric” section that explained the best way to choose your fabrics for your project.  (Spoiler alert:  Don’t try to match your tee shirts!)
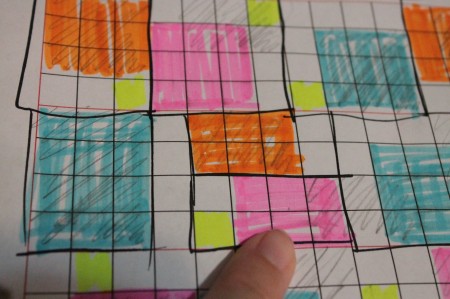
  • The entire “Easy Planning Guides” chapter.  To be honest, I skimmed over the other parts and camped out here.  I knew I wanted to start with 5 inch squares (a charm pack) so I used her “5 inch Grid Cut Block Chart to get the measures I needed to cut my tees.

My dislikes:

  • I found her grids too small for me to work with and designed my own in excel.

Conclusion:
I already know how to sew.  I already know how to piece a quilt top in a basic 4-patch or 9-patch.  If I didn’t, I’m not sure this book would have helped much.  But since I already knew those techniques, I was looking for a book that would help me design a cute t shirt quilt.  That’s why I found the discussion about fabrics so helpful.  I also love math and grids, so her planning guides were right up my alley.  This book does not teach you how to quilt–only piece the quilt top.  If you need a book to teach you how to quilt, keep looking.

Would I buy it for myself?
Yes.  If I had a stack of t shirts and a basic sewing knowledge, this would be a great place to start.

Would I buy it for a beginner sewer?
Probably not, but for a sewist who has mastered straight seams—you’re good to go!

Memories Made Into A Tee Shirt Quilt

Oh the memories in our new tee shirt quilt ! My big girl started a new school back in August.  That means we had a stack of tee shirts that she wasn’t going to wear any longer.  I’ve been putting back her EGM tees since Kindergarten, saving all those memories– her “I’m in the Eagles Nest” shirt to her first swim team shirt.  I had running club shirts and church camp shirts and even a reindeer sweatshirt with her hand prints and foot print.

Tee Shirt Memories

This fall, I took the time to stop and organize these shirts.  That’s not entirely true.  We’re seriously decluttering to get the house ready to put on the market.  I was afraid that if I put this stack of shirts in storage, I’d not look at them again until she’s a senior.  So…I decided to take a moment weekend to create a memory quilt.  I pieced it over the Labor Day weekend.  It was later quilted by my aunt.

The toughest part of the process was also the most fun!  I choose to use 5 inch squares of fabric to complement my tee shirts.  Knowing this in advance made it easy to know what size to cut my tees down to.  It also made laying out the quilt so much fun!  I love a good logic puzzle.

tee shirt quilt grid

Interested in creating your own?  I’ll be happy to show you how.  Before you get started, I’d recommend you start with your tee shirts, some graph paper, and this book:

I’ll review the book for you soon.  Please leave me a comment if you want more how to info.

t shirt quilt book

Sewing Machine Love: Your Sewing Machine Manual

Where is your sewing machine manual?   Why do you even need it?

Your sewing machine manual is the go-to reference for the maintenance and use of your machine.  Having trouble balancing your thread tension?  Go to your sewing machine manual.  Can’t remember which bobbin to buy?  Go to your manual.  Should you oil your machine?  Go to your manual.

So…where is your sewing machine manual?  Can’t find yours?  Inherited mom’s old machine and no manual?  Try here.  You can also try eBay.  If you do have yours, is it close?  I keep my manuals right here, within arm’s reach:

sewing machine manual

Every sewing machine manual is slightly different.  Some are only a few pages long, others are 1-inch thick spiral notebooks.  Some have 4 different languages within them.  Your manual isn’t going to be much help if you don’t know what type of information is inside.  Here’s a little create-your-own table of contents for the information I use the most in my manuals.   

Needles, Threads, and Woolly What?

series label

This is my second installment in my serger series.  Today, it’s all about thread and needles!  (You can find information about threading your serger here.)

Let’s talk needles first.  Your serger manual will list the type of needles required for your machine.  My simple Janome Juno 3434d requires just basic sewing needles.  Others need a “serger” needle or a particular style.  Whatever brand or model you need, you’ll want to choose the appropriate size needle.  For a “regular” weight cotton like a gingham or those cute calicos from HL, you’ll need an 11.  For heavier work, like cord or denim or fleece, you’ll want a 14.  Basically, you choose the size of your needle based on your fabric choice.

IMG_6147

Now for threads.  Your serger will need 4 spools of thread.  That’s a lot, but there is good new.  In most pieces, you’ll only see the left needle thread.  That means that the other three threads don’t have to match, only blend.  I have found that I really only need a few colors for all my projects:  dark grey, red, royal blue, white, and khaki.


IMG_6148


I will sometimes use Woolly Nylon in my looper threads (those two spools on the right).  Woolly Nylon is a name brand, so you might see it as Bulky Nylon.  I find that this thread is a little more difficult to thread through a needle, but I love the finish it gives my garments.

Load up your machine with some thread and give it a go.  Which do you prefer?  Serger thread on all or the Woolly Nylon?  If you’re having trouble making an even, balanced stitch, no worries!  We’ll talk tension next week.


Loopers? Flatlocking? What?

A serger is a wonderfully helpful, time-saving machine—if you aren’t afraid to use it!  Over the next few Tuesdays, I hope to share a few serger tidbits that can take the intimidation out of this sewing room essential.

series label

So who needs a serger?  We’ll anyone who sews on a regular basis.  I’m not talking about your friend who only uses her sewing machine every other Spring to hem pants.  I’m talking about you—the hobby seamstress who loves making pillows and napkins and curtains and clothes.  I’m talking about the hobby seamstress who wants to take her hand-made gifts to the next level.

Why do you need a serger?  Well, for starters, a serger allows you to complete your sewn pieces with a professional finish.  A 4-thread serger can also stitch and overlock the edges at the same time, saving you some time.  A serger stitches so much more quickly than your sewing machine.

So…you already have a serger?  Great.  Go get it out of the box and set it up.  Does it look kinda like this?

IMG_6121

My machine is a Janome Juno 3434d.  It’s on the less expensive end of the serger spectrum.  It doesn’t chainstitch or coverstitch.  It also doesn’t have the air-threading that the Babylocks have.  It does have all metal parts and can gather, blind hem, flatlock, and, of course, do a fabulous overcast.  This little machine, in my opinion, is perfect for the home seamstress.

There are a few parts you need to know on your machine.  I’ve labeled them below.

IMG_6105

To use a serger, you just place your fabric under your presser foot and sew:IMG_6130

One major difference is that the knife trims off excess seam allowance before the stitches are made.  You’ll want to avoid using pins for this very reason.


IMG_6149


There are two ways to thread a serger, if you don’t have one of the fancy air-threading machines:  from scratch or tying off. 

IMG_6108

To thread from scratch, follow the instructions in your manual.  The diagrams are probably also on your machine.  You MUST start by threading the upper looper and then the lower looper.  Then you can thread the right needle and then the left needle.  I’m not going to lie.  This method can be a bit more tedious, but it is possible.  A pair of tweezers will make the job easier. 

If your machine is already threaded, tying off is the easiest way to go.  To tie off:

1.  Clip the needle threads just above the eye of the needle.

2.  Hold the existing chain and sew until the chain consists of only 2 threads.  (These are remaining threads your looper threads.)

3.  Cut the looper threads near the thread spools.  Replace the spools with your new threads.  Tie threads from your new spools to the existing threads with overhand knots.

4.  Turn your looper threads tension dials to 0.  (Write down the original setting so you can go back to it.)

5.  Gently pull the upper looper thread behind and to the left of the needle until the knot is behind the needle.  Repeat for the lower looper thread.

6.  Replace the two thread spools for the needle threads and rethread the needles. 

7.  Return your tension dials to the original settings.  Hold all the threads together behind the machine and sew pulling the thread chain.


Well, how’d you do?  Is your machine threaded?  Great.  Next week, I’ll talk about threads and needles and such.

series label

Week 1:  The parts of your machine and how to thread it

Week 2:  Selecting needles and threads for your project

Week 3:  Balancing the tension on your machine

Week 4:  A serged pillowcase

Week 5:  Hemming with your serger

Week 6:  Gathers and elastics

Week 7:  A ruffled pillowcase


March in Pictures

I had planned on entitling this post: My Week in Instagram, but if we’re being honest, it’s really just been my month.  Easter is a very busy time at PersonaliTy Children’s Clothes.

God has blessed my little business and I’m so grateful.  I spend my days sewing (which I love!) and still have a flexible schedule to be where my kids need me to be. 

IMG_20130307_110917 IMG_20130313_081049 IMG_20130314_074806 IMG_20130314_145735 IMG_20130314_160642 IMG_20130318_165951 IMG_20130319_134525 IMG_20130320_074558 IMG_20130321_145013 IMG_20130321_184143